Deploy within Google Cloud Platform (GCP)
Introduction
The Synergy SKY Platform is a Linux-based VM image that can be hosted within most virtualized environments. This article describes deployment within Google Cloud Platform (GCP) environments including how to:
- Create the image in your cloud portal
- Create the VM Instance
- Perform post install tasks
You can view our video tutorial on the bottom of this article for a full walkthrough assisted by one of our engineers.
Requirements
| Server Requirements |
e2-standard-4 - 4 CPU, 16 GB RAM, 500 GB HDD (SSD mandatory)
or
n2-standard-4 - 4 CPU, 16 GB RAM, 500GB HDD (SSD mandatory)
|
| General Requirements |
Please refer to the General Requirements
|
| Google Cloud Account |
You have already signed up for a Google Cloud subscription
|
Step-by-Step Guide
Create the Image in Your Cloud Portal Images
- Starting from your GCP project dashboard, expand the left hamburger menu
- Scroll to 'Compute' section
- Expand the 'Compute Engine' menu
- Under 'Storage' select 'Images'
- Enable the Compute Engine & API if asked
Note: It may take a few minutes to spin up if this is the first time using these services
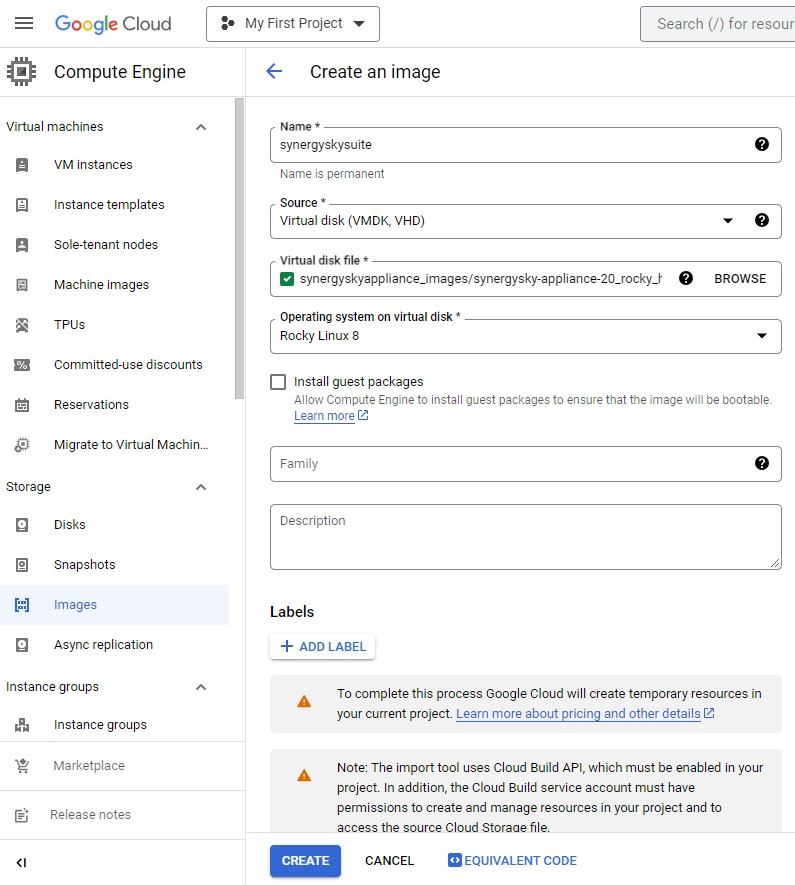
- At the top, click "[+]CREATE IMAGE"
- Name your image. e.g. "synergyskysuite"
- Change 'Source' to 'Virtual Disk (VHDK, VHD)'
- Enable Cloud Build API and allow
Note: You may need to click allow twice if first attempt fails.
- Copy the following line into the 'Virtual Disk File' field
synergyskyappliance_images/synergysky-appliance-20_rocky_hyperv.vhdx
Note: You should see a green checkbox confirming the path as correct
- For Operating system on virtual disk select "Rocky Linux 8"
- Untick Install guest packages
- Select a location that works best for your company
- Click 'Create' at bottom
This process will take approximately 15 minutes to complete. This image will be used for creating the virtual machine hosting the Appliance.
Creating the VM instance
- In the Compute Engine menu on the left, under 'Virtual machines' click 'VM instances'
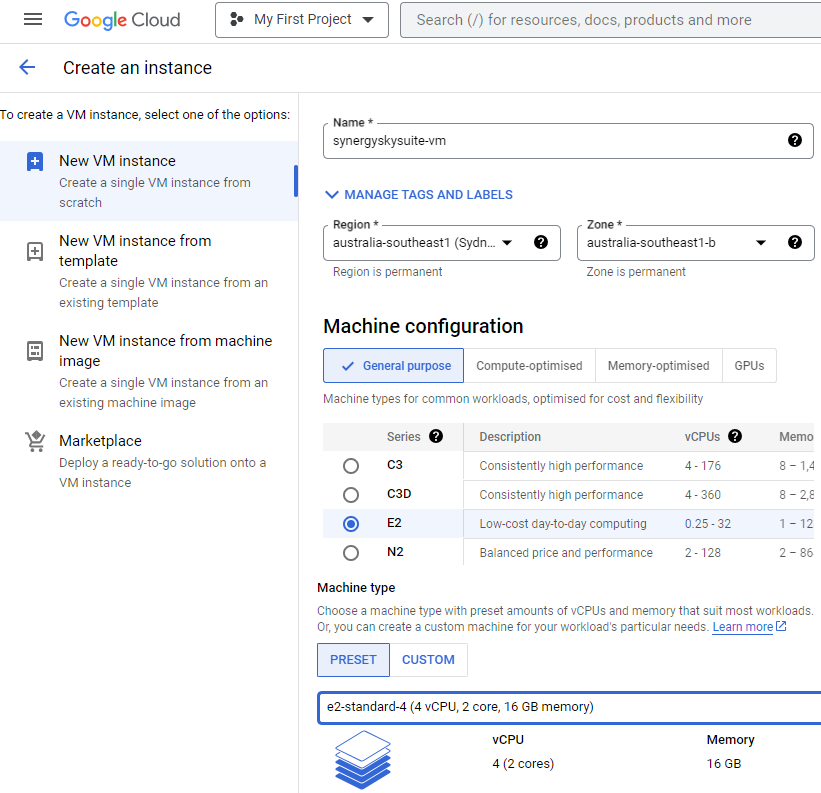
- At the top, click '[+]CREATE INSTANCE'
- Name your Virtual machine according to your hostname standard
- Select appropriate region and zone
- In machine configuration select a configuration fulfilling the server requirements listed previously
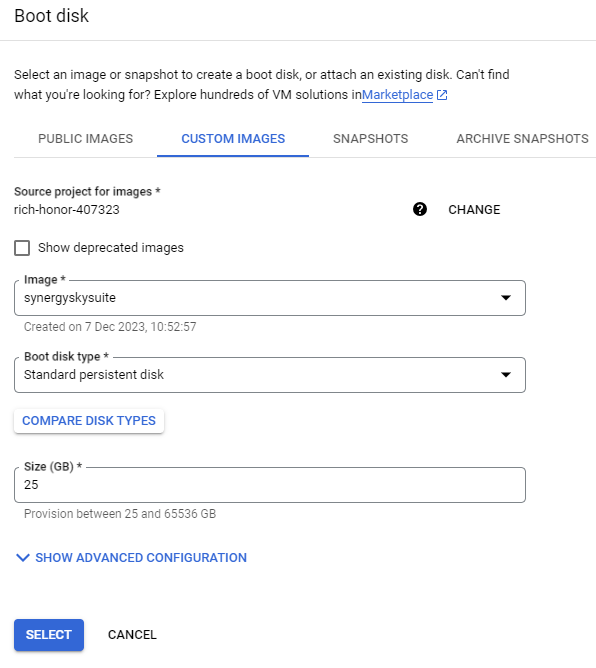
- Under Boot disk section, click “change”
- Select the tab named “Custom images”
- Find “synergyskysuite” in the image list (make sure you are in the same project as you created the image in first paragraph).
- Set the boot disk type to: Standard persistent disk, 25GB
- Press select at the bottom of the screen
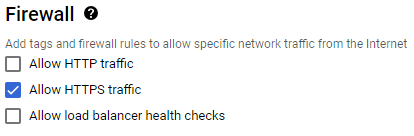
- Under Firewall, check box for Allow HTTPS traffic
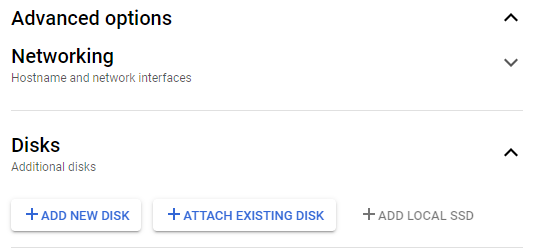
- Expand the 'Advanced options' link
- Select the 'Disks' tab
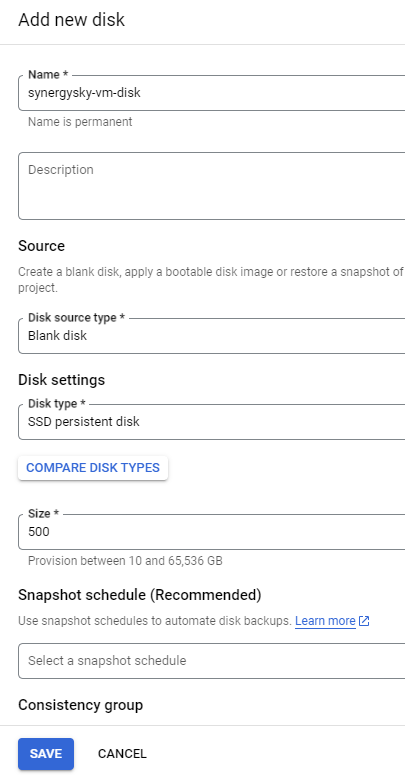
- Click '+Add new disk'
- Name your disk e.g. "synergysky-vm-disk"
- Select type: SSD persistent disk
- Snapshot schedule can be set up to your company policy - but will effectively work as an automated backup, which is highly recommended.
- Source type: Blank
- Mode: Read/Write
- Size: 100GB or more (500GB recommended)
- Press Save.
- Now that the secondary disk is created, click CREATE at the bottom of the page. This will create our Platform instance on the GCP.
Post Install Tasks
- The first time you log into the Synergy SKY platform over SSH with the user admin, a process of setup the data-disk will start. It should take about a minute.
- Then additional first-time procedures will run for about 2 minutes.
- When you see the menu screen, you are ready to continue with the next step
Google Guest Agent
If you require to sign in through GCP ssh client or GCP SSH key management you can follow Google's Guide on installing required packages at:
https://cloud.google.com/compute/docs/images/install-guest-environment#in_place
Make sure to also install google-guest-agent
Next Step
Your instance should now be running and when you see the menu screen you can continue with the configuration as described in this article.
Video Tutorial


