Microsoft Teams Lobby Auto Admit
Overview
A safe and secure way to admit VTC rooms into Teams meetings.
In the Synergy SKY Management Suite, video devices you control can be defined as either secure or unsecure / black- or whitelisted. Rooms marked as secure will then be able to bypass the lobby and get directly into the meeting.
Prerequisites
- SUITE version: 31.10.6698 or later
- Azure and Microsoft Teams admin rights
- Service Account with Microsoft Teams User License with Multi-factor Authentication disabled
- Username and Password for the service account
Azure Configuration
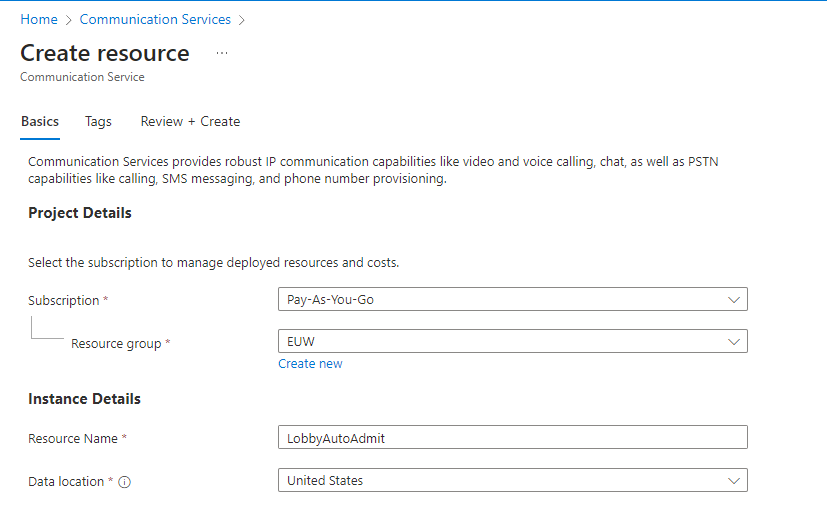
- In Azure navigate to Communication Services
- Click Create
- Select your Azure subscription, Resource Group, create Resource Name for this service and select data location. If you do not have a Resource Group, you will need to create a new Resource group by clicking "Create New".
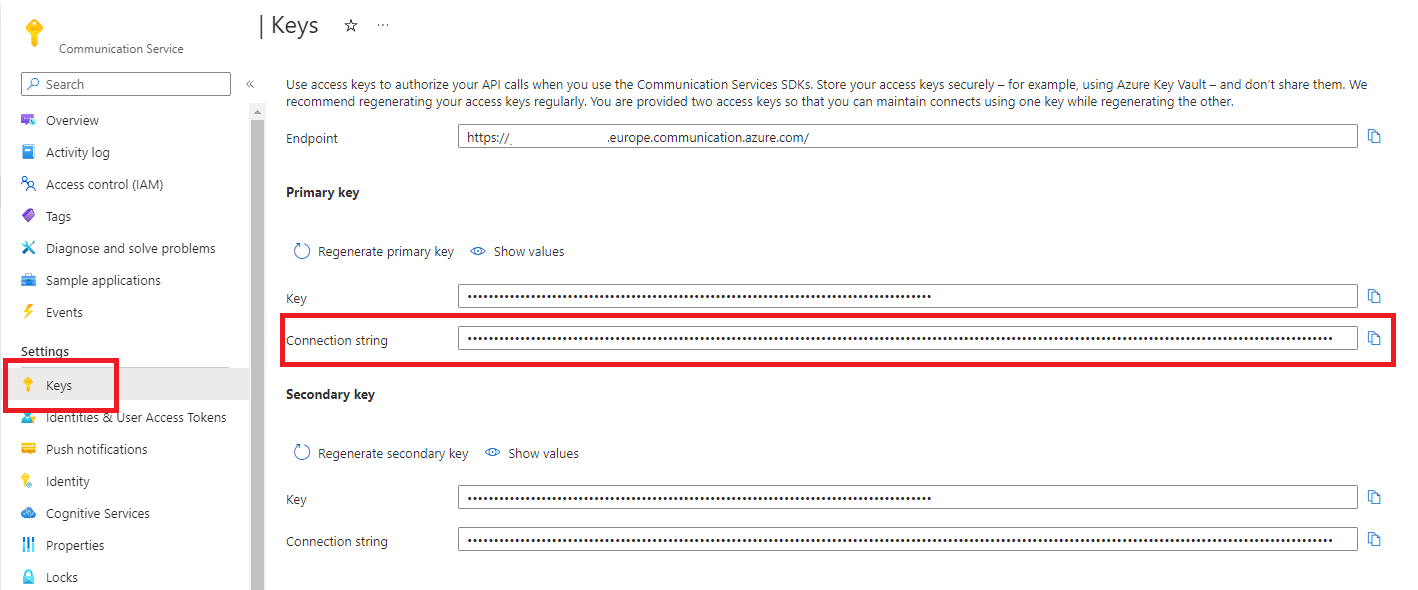
- Once Azure has processed the request, navigate to Keys and copy Connection string you will require this later to use in SUITE.
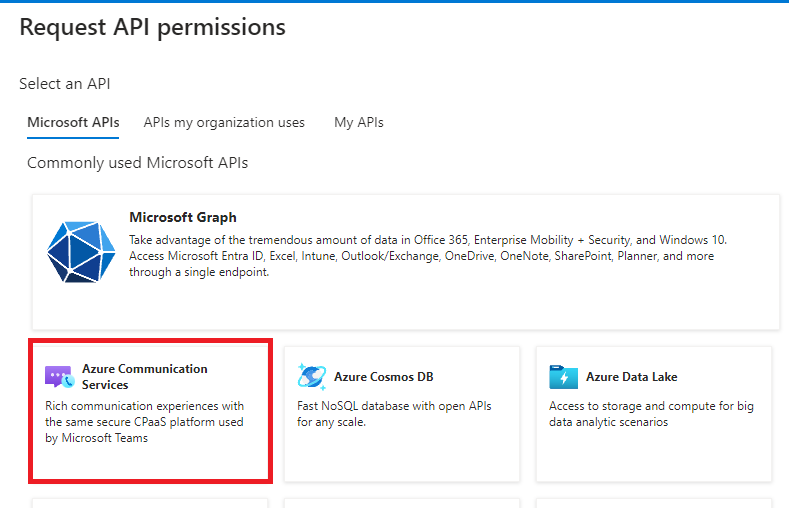
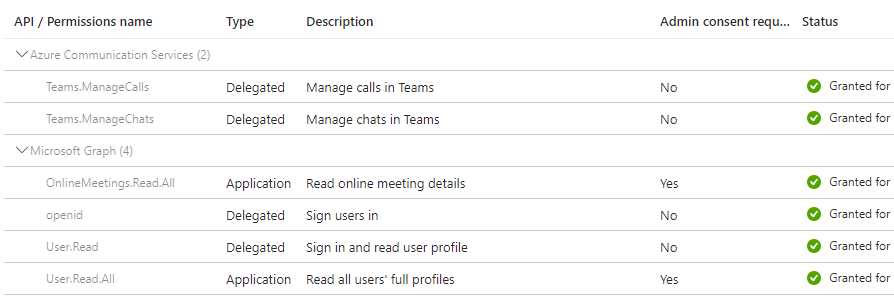
- A new App Registration is required with following API permissions:
- Azure Communication Services
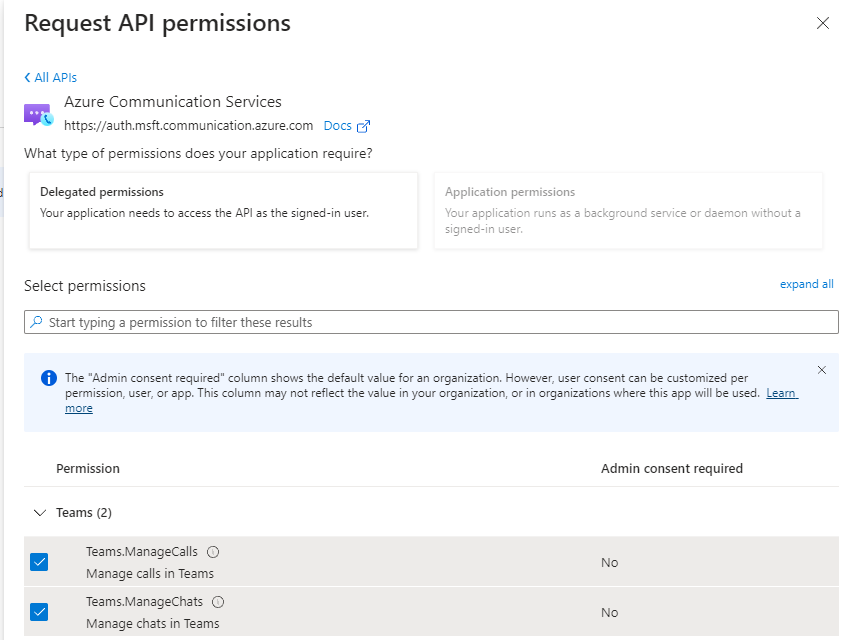
- Teams.ManageCalls
- Teams.ManageChats
- Microsoft Graph
- OnlineMeetings.Read.All (Application Permission)
- openid (Delegated Permission)
- User.Read (Present by Default)
- User.Read.All (Application Permission)
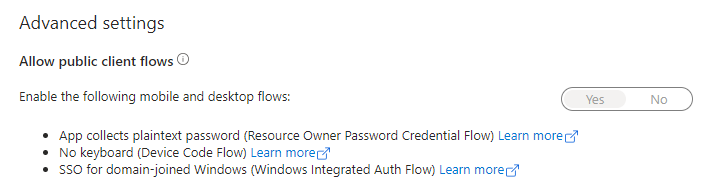
- Under Authentication section, ensure that "Allow public client flows" is turned on
- Create a new secret for the app registration, this will be required to add the new app registration to SUITE.
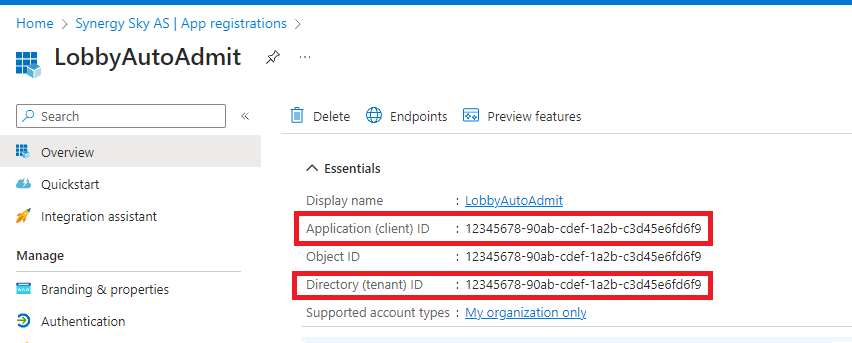
- Copy Application (client) ID and Directory (tenant) ID. Keep the secret, application ID and directory ID in temporary notepad to be used in SUITE.
Microsoft Teams Policy
In order to apply/grant the policy access you need to add the App Registration to Global policy. To do this, you will need to have the Application (Client) ID or provide it to your Microsoft Teams Admin.
You can find Microsoft guide on installing the Microsoft Teams Module here.
To be able to set/add policies you will need to be able to run commands using MicrosoftTeams module in PowerShell.
- Import Microsoft Teams Module to be available in PowerShell by running the following command
Import-Module MicrosoftTeams
- Connect to Microsoft Teams backend using:
Connect-MicrosoftTeams
- You can double check if there are any pre-existing policy/apps assigned to Global or any other existing Policies by running:
Get-CsApplicationAccessPolicy
- To add the new app registration for Microsoft Teams Lobby Auto Admit to function there are two options:
-
If you have any application ID's listed in Global you will need to use an alternative method, as performing Grant-CsApplicationAccessPolicy will replace everything in Global with application ID's from the Policy you have applied to it.
-
Instead of creating you can add additional app registration to a policy by running the following:
Set-CsApplicationAccessPolicy -Identity <your_access_policy> -AppIds @{Add="<applicationid>"}
You can use this to add the new application ID directly to Global if you do not have any other application access policies but have previously granted applications directly to global.
-
Adding the new application ID to an application access policy you will need to grant the application access policy to global by running the following:
Grant-CsApplicationAccessPolicy -PolicyName <your_access_policy> -Global
- The following is only to be used when there is no other Application policies in place and need to create a new one.
- To create a new policy run the following command.
New-CsApplicationAccessPolicy -Identity ssky_lobby -AppIds <applicationid>
- Then you need to grant the new policy at global level by running the following:
Grant-CsApplicationAccessPolicy -PolicyName ssky_lobby -Global
-
You can move to configuring SUITE to configure the new app registrations.
Configuring SUITE for Lobby Auto Admit
To add and enable Lobby Auto Admit in SUITE you need to do the following:
-
- Within Config Tool navigate to General Settings -> Integration Settings
- Add Connection
- Select MS Graph API
- Enter the details from LobbyAutoAdmit app registration and test connection.
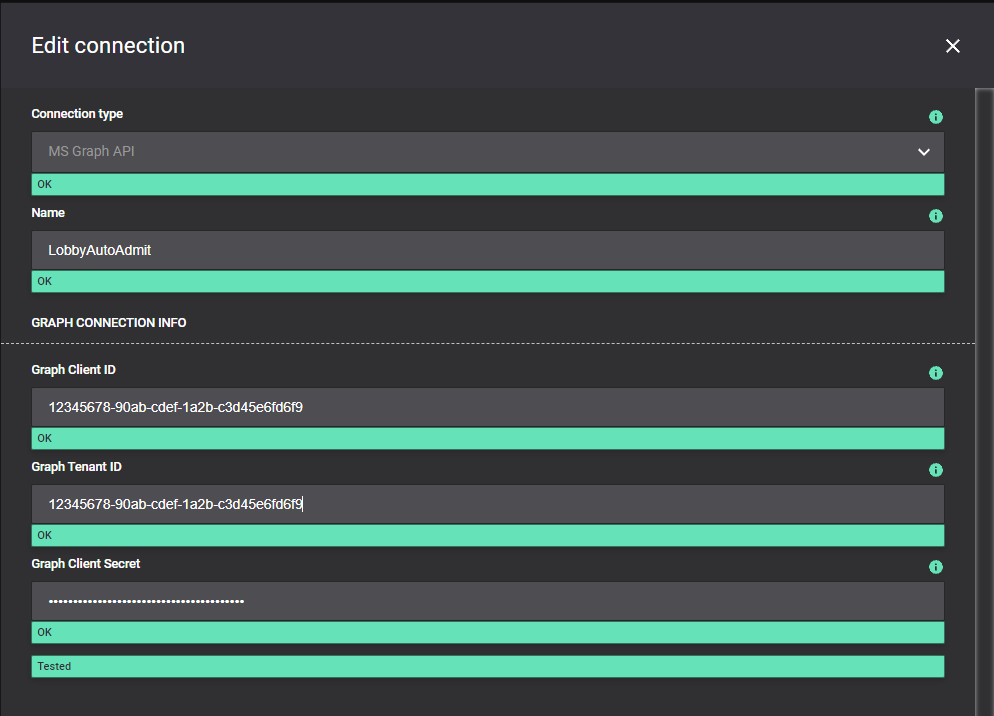
- Click Save
- Add API Integration
- From drop down select Teams Lobby and the Connection you have created
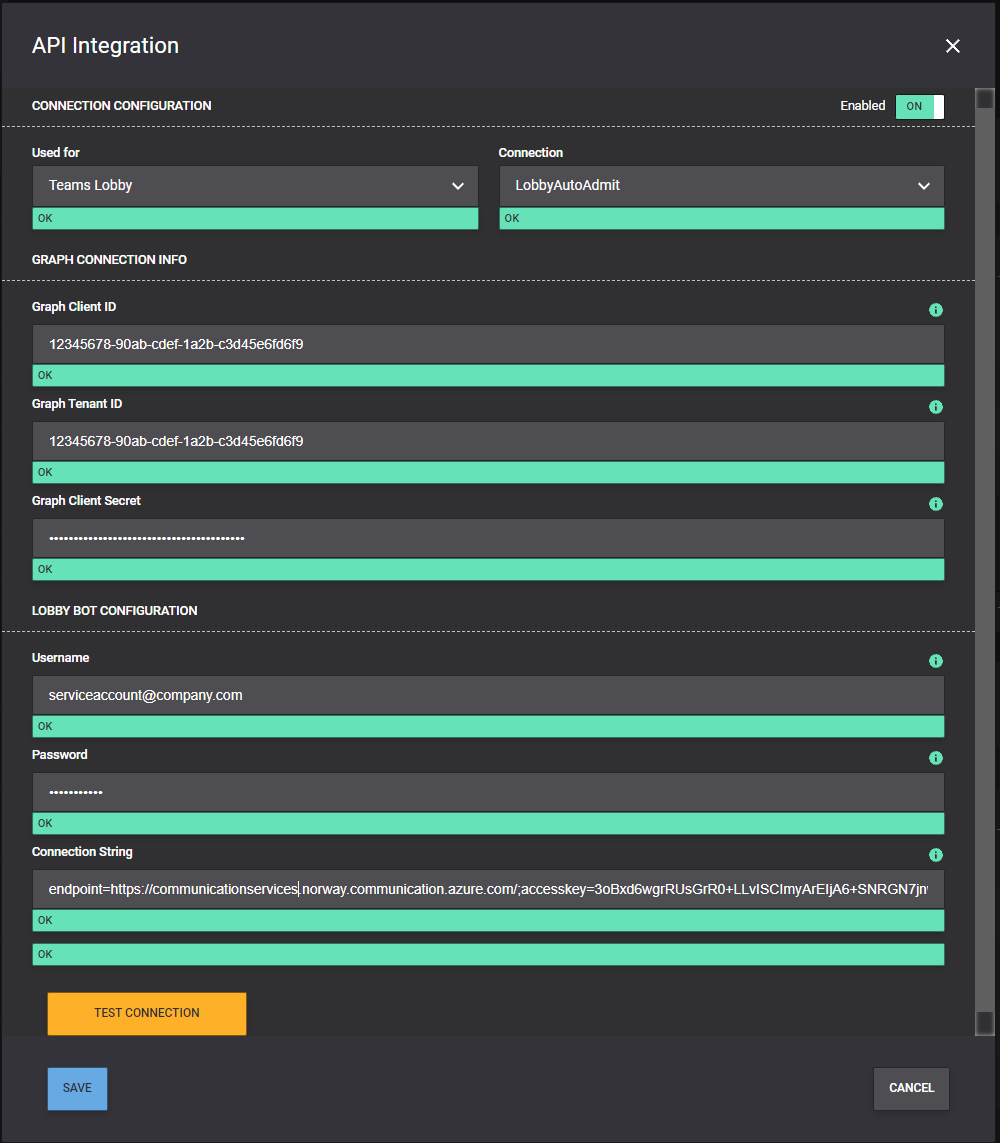
- Enter the service account user (E-Mail), password and Connection string from Communication services.
- Test Connection, this will successfully test when earlier steps have been completed successfully.
- Click Save and Save Changes
- Navigate to Rooms as the name of the rooms in SUITE configuration will have to be updated.
- The Room Name has to match exactly how the room will be displayed.
For example, a Webex Registered video system takes the workspace name. In the following example the name it will display in the meeting is "Endpoint Display Name".
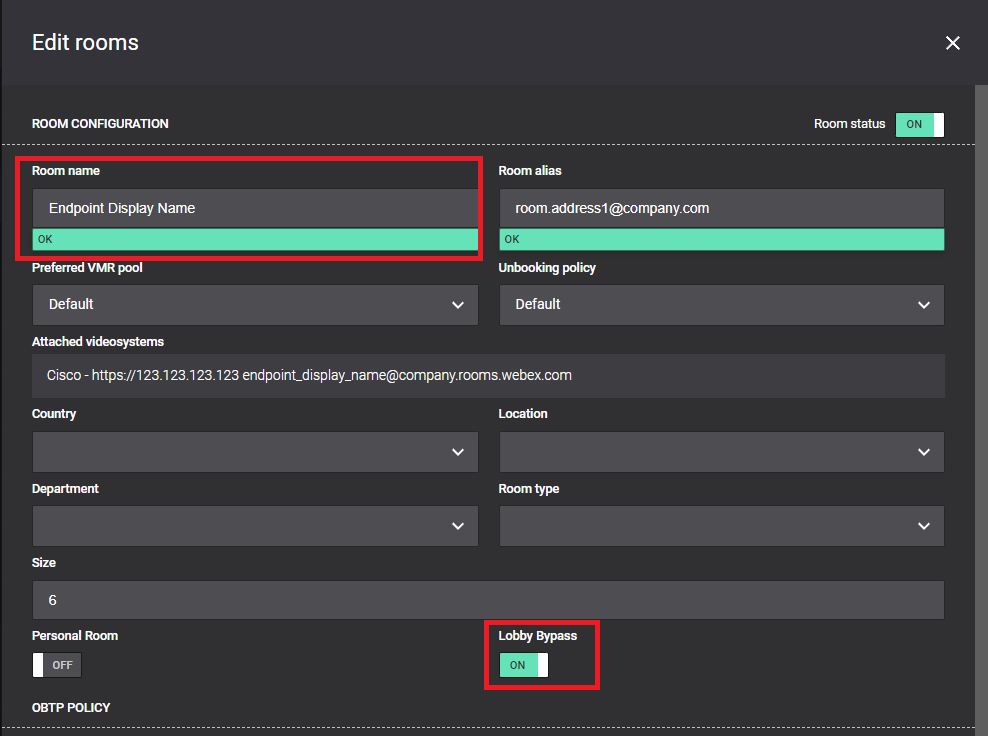
- Enable Lobby Bypass toggle.
- Repeat for all rooms that you would like to have this enabled for.
- Save Changes and deploy configuration.


