Quick Start Keycloak
Introduction
As part of this guide, you will be taken through step-by-step to setup Keycloak for your Management Suite. The naming of the realm, clients, and roles cannot be changed otherwise it will cause issues when attempting to access Config, Control, Insight, or attempting to validate that Keycloak is configured.
This is available on Synergy SKY Management Suite 31.07.6344 or newer.
To begin please get in touch with us by creating a ticket and we will provide instructions on how to start Keycloak.
Initial Setup and Testing
- Select Synergy CONFIG from Synergy SKY Management Suite homepage
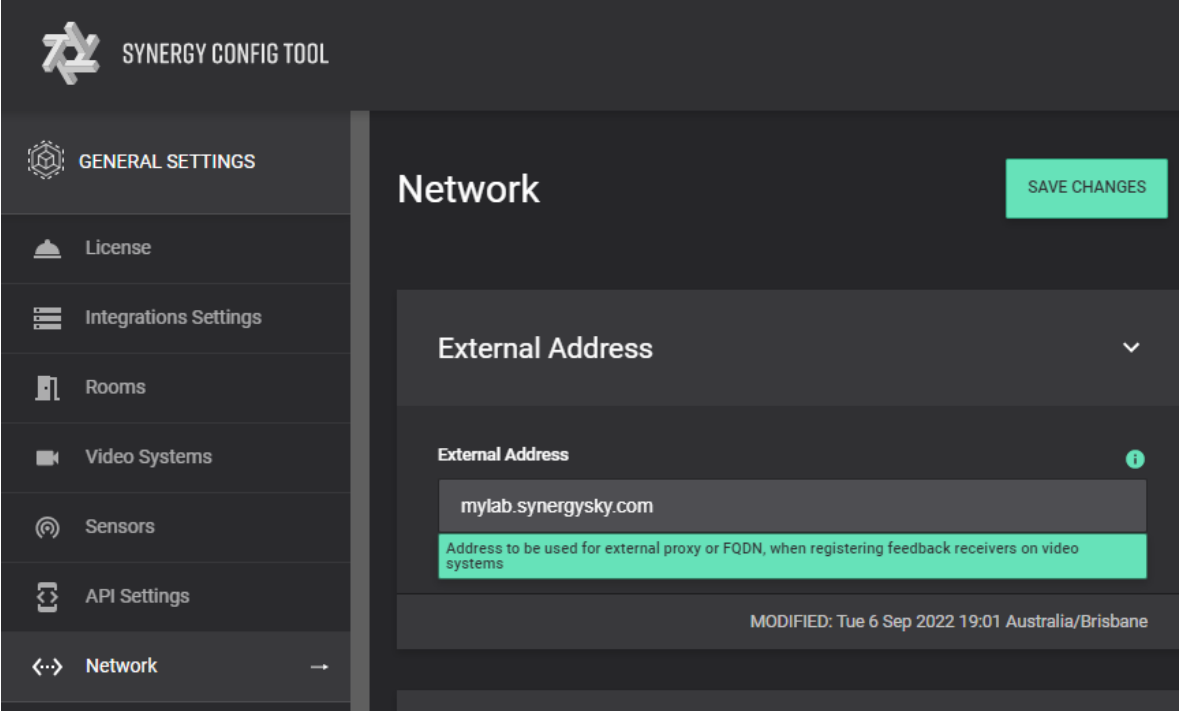
- When using FQDN make sure it has been added to ‘External Address’ in Network under General Settings and click on the Save Changes button at the top right of the screen
- If you have not reached out to us via ticket, please do so now as you will not be able to proceed.
- Reload the Synergy SKY Management Suite homepage and there should now be a Keycloak icon to be clicked on
- Please wait at least 2 minutes before clicking for Keycloak to be fully enabled, otherwise webpage will not load
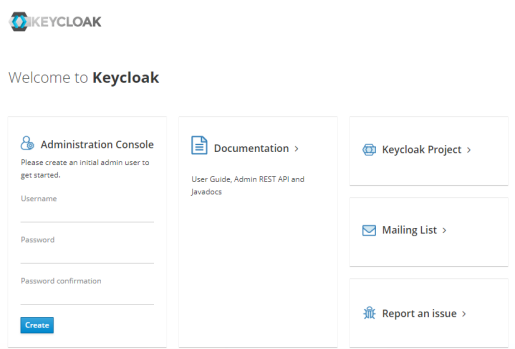
- Create an admin Username and Password account and then login with those details to the Administration Console
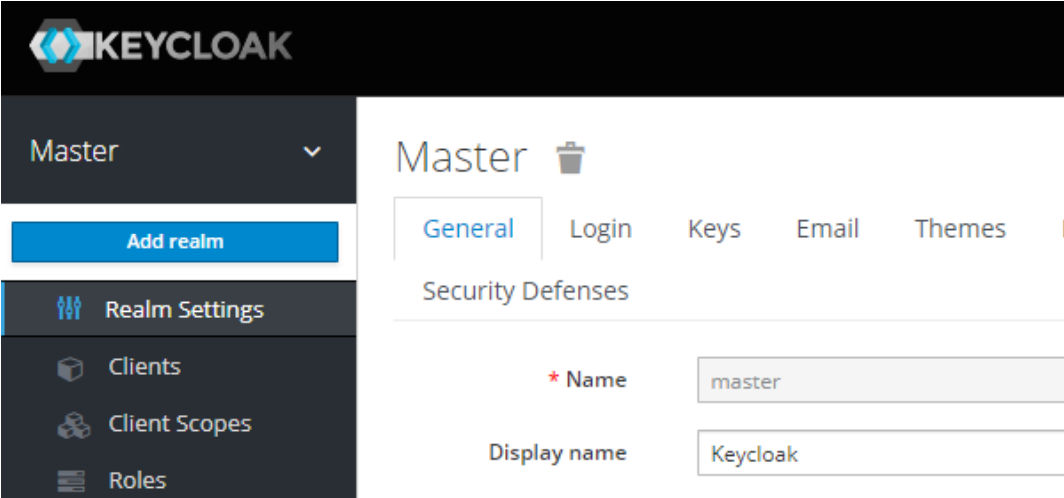
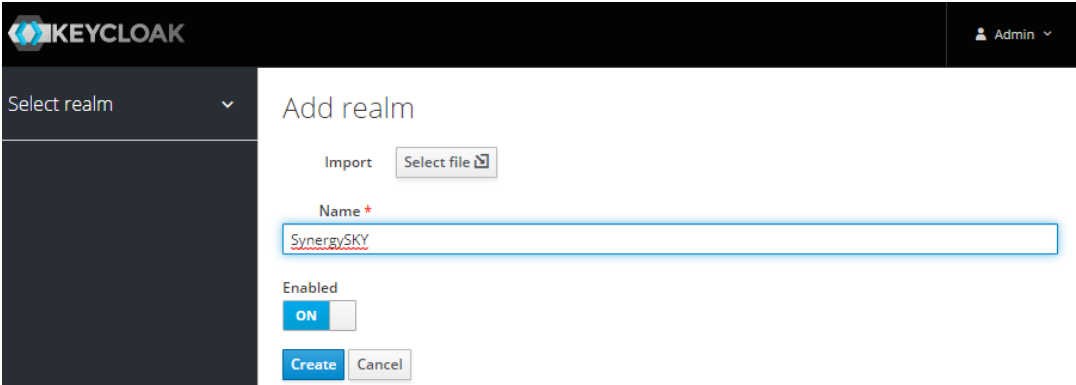
- Move the cursor over the drop-down that says Master and click on Add Realm
- Import the template, this will auto-populate the name. Do not change this.
Please unzip the folder and upload SynergySKYTemplate.json

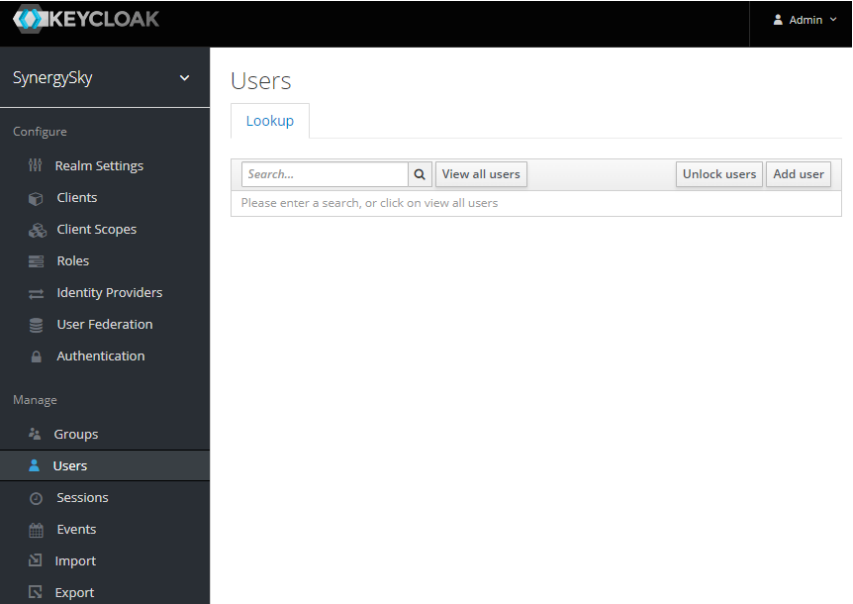
- Select Users from left hand panel and click Add User
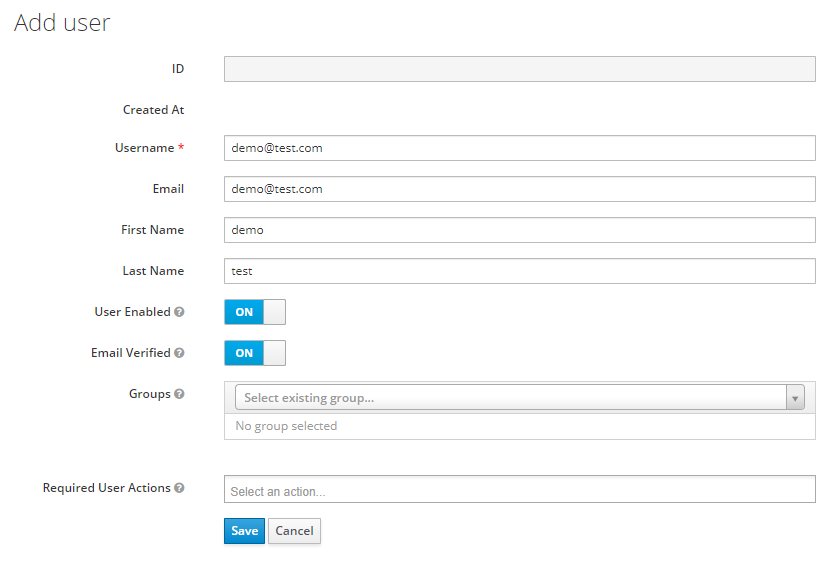
- Create a local user (E.g. demo@test.com) then click Save
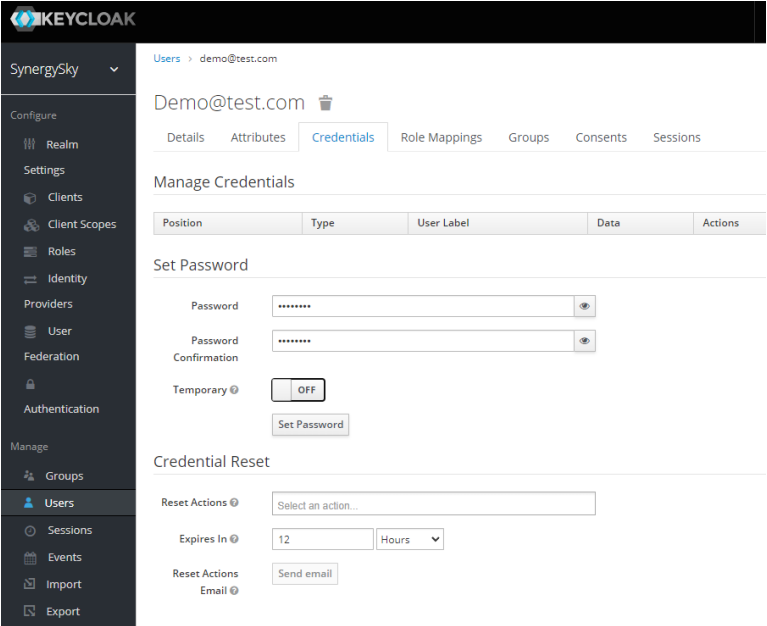
- Under the Credentials tab type a password (E.g. password), toggle Temporary to OFF and Set Password
- Under the Role Mappings tab use the Client Roles drop-down to select ‘SynergySKYConfig’ and add ‘ConfigAdmin’ to Assigned Roles
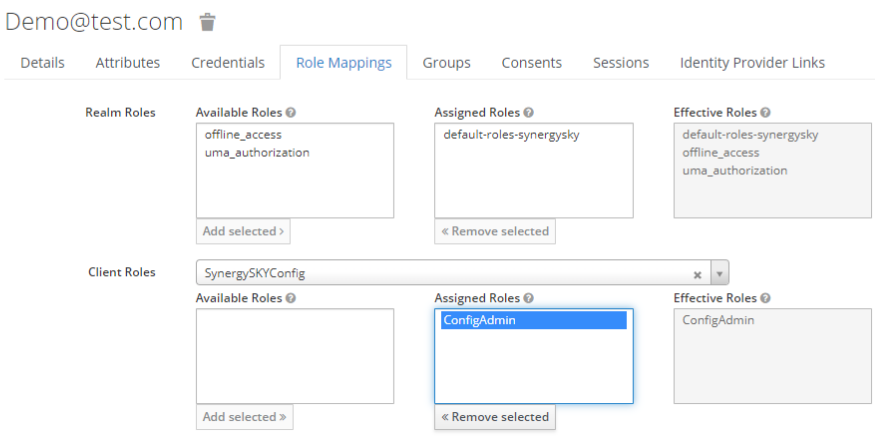
- Add Roles from ‘SynergySKYControl’ & ‘SynergySKYAnalyze’ in the same manner
- You can assign all Insight (Analyze) Roles to a single User or only one (1)
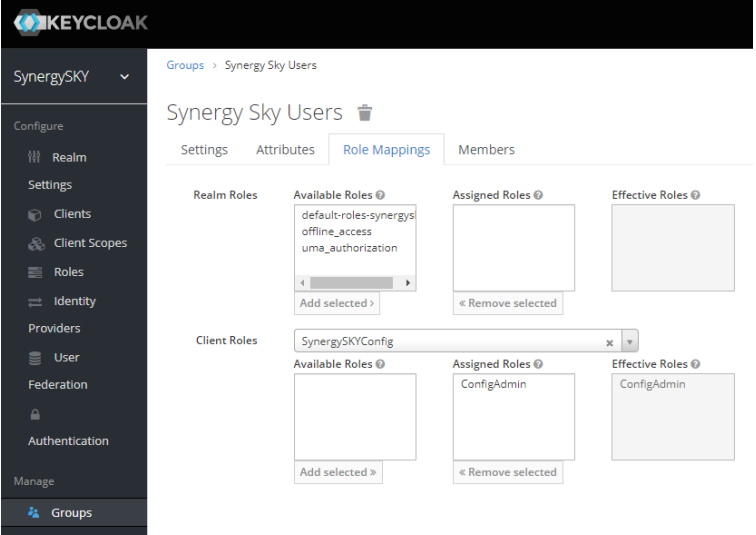
N.B. It is possible to assign roles by default under the Groups heading in the left-hand panel. Here you can create a group, assign Client Roles and then add to Default Groups

- Open the Synergy SKY Config Tool page and select Authentication under the General Settings
- Toggle the switch to ON
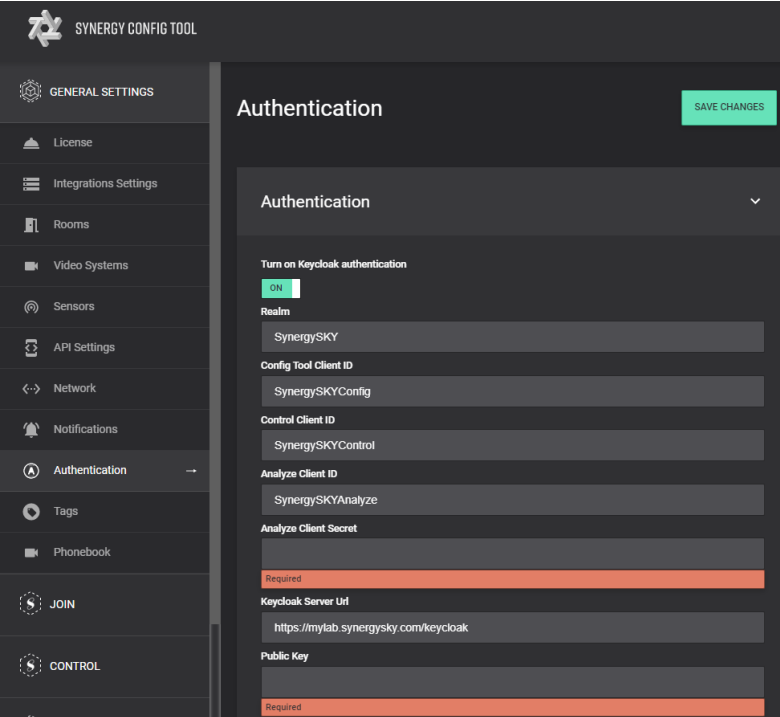
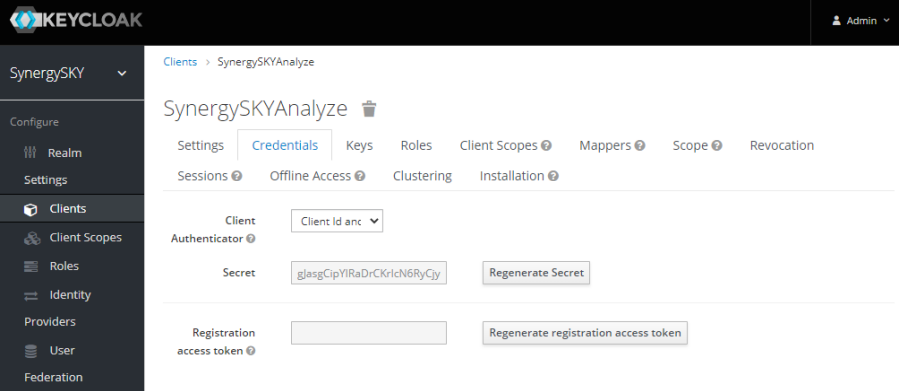
- To get the Insight (Analyze) Client Secret, go back to the Keycloak configuration page and select the SynergySKYAnalyze client found under Clients.
- Select the Credentials tab, click regenerate secret and copy the Secret from this page to the Analyze Client Secret in the Config Tool
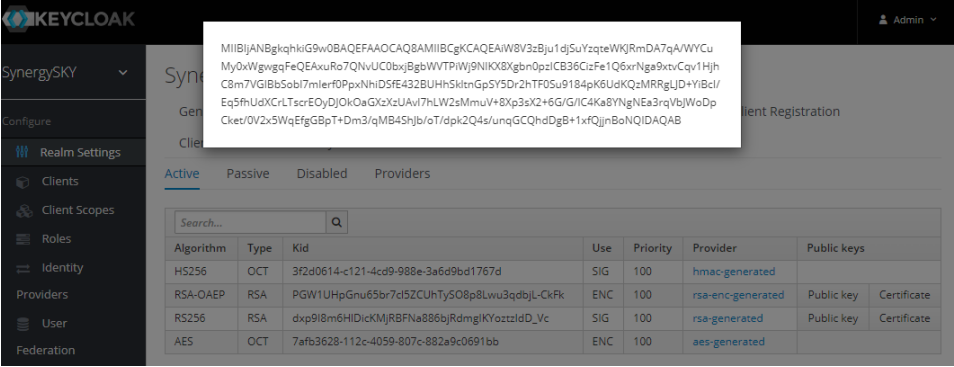
- To get the Public Key, go back to the Keycloak configuration page and select Realm Settings
- Select the Keys tab and then click on the Public Key button across from RS256/RSA and copy text from the popup and paste into the Config Tool

- Once Analyze Client Secret and Public Key have been added, click on Verify Keycloak Login button and Sign In with the User (E.g. demo@test.com) account
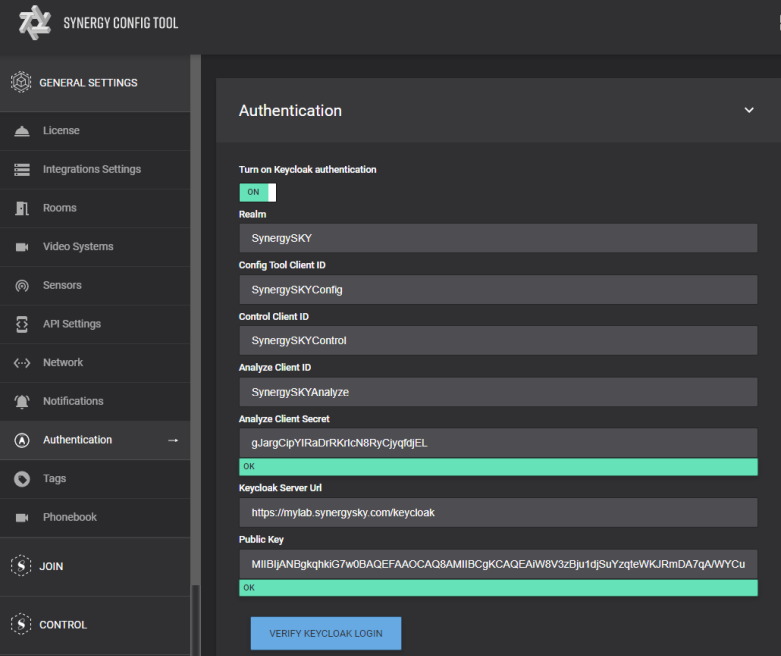
- Once verified, click on Save Changes in the Config Tool and then deploy the configuration
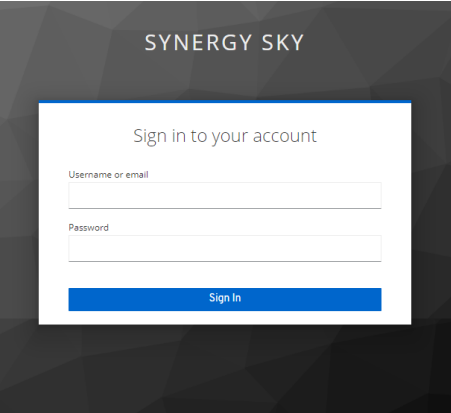
- Open a new web browser and try to access Synergy SKY Config Tool page using the User created in Keycloak
Adding Azure AD as Identity Provider
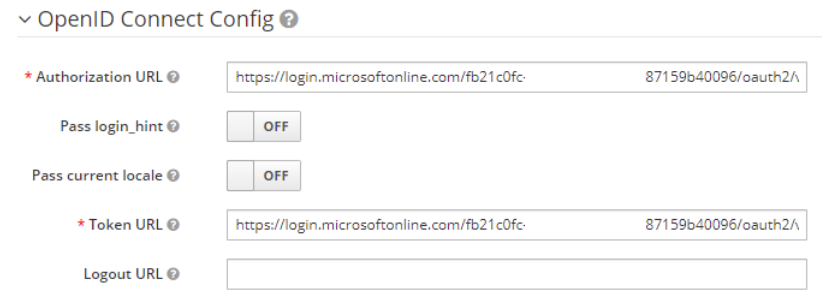
- In the Keycloak config page, select Identity Providers from left hand panel and choose OpenID Connect v1.0
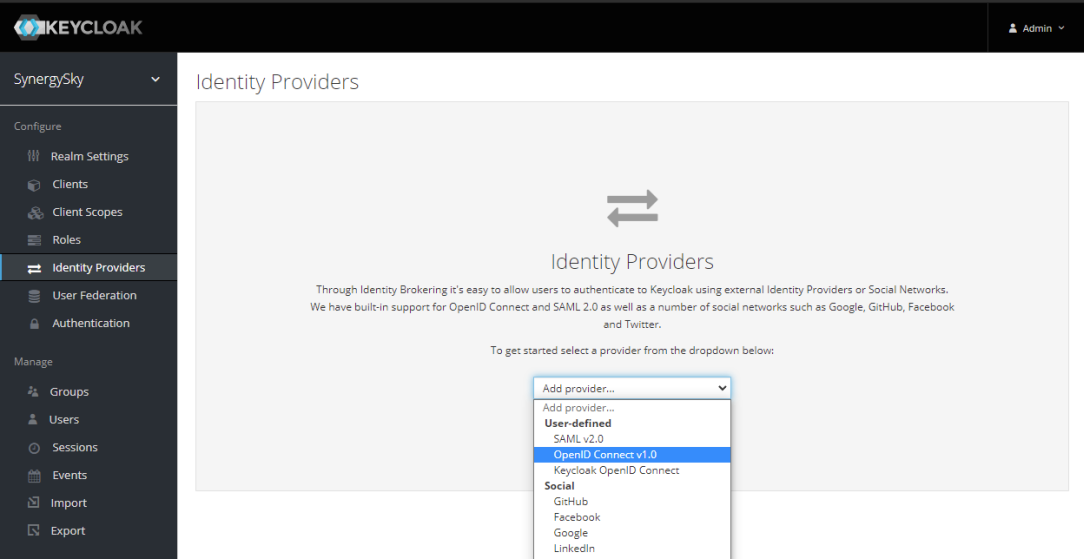
- Give an Alias name (E.g. azuread)
- Give a Display Name (E.g. Azure AD)
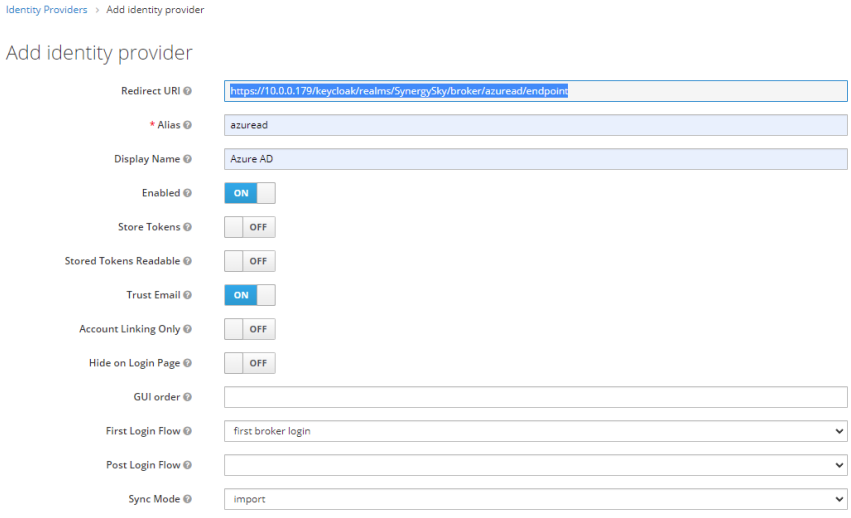
- Copy Redirect URI information for use in Synergy SKY Management Suite
Register Application in Azure AD
- Go to aad.portal.azure.com and log in
- Select App Registrations and then click New Registration
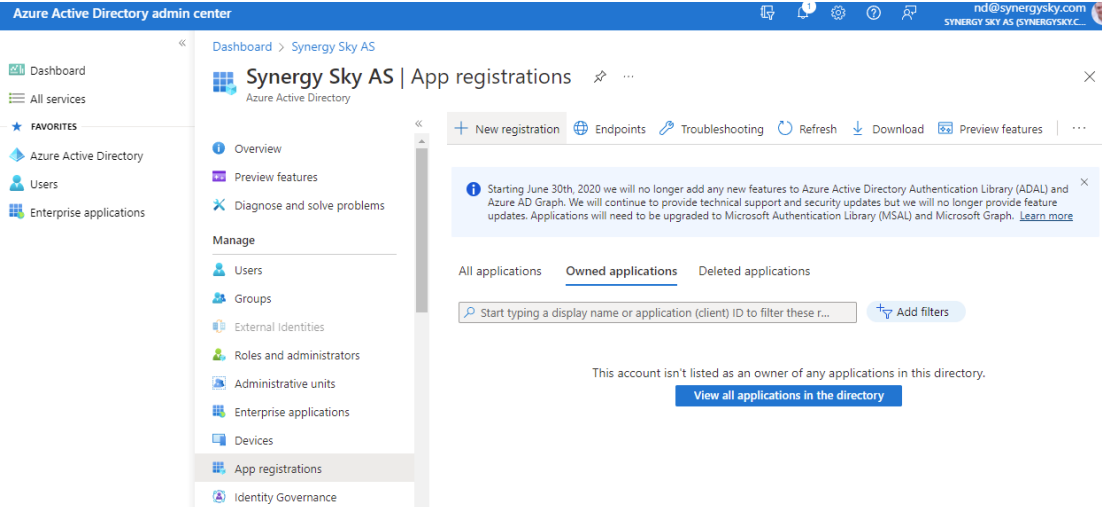
- Give application a Name (E.g. Keycloak Demo)
- Select the Supported account types (E.g. Single Tenant)
- Select Web for Redirect URI and paste link copied from Keycloak configuration page
- Click on Register

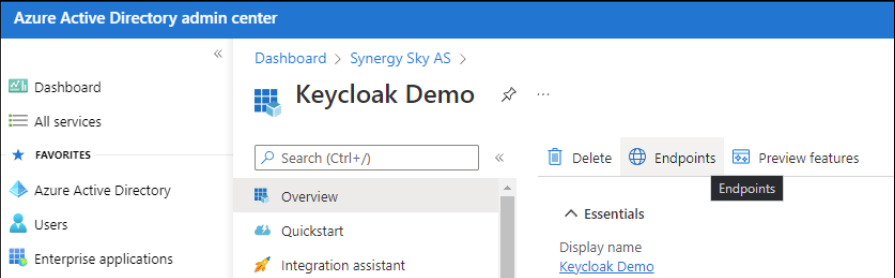
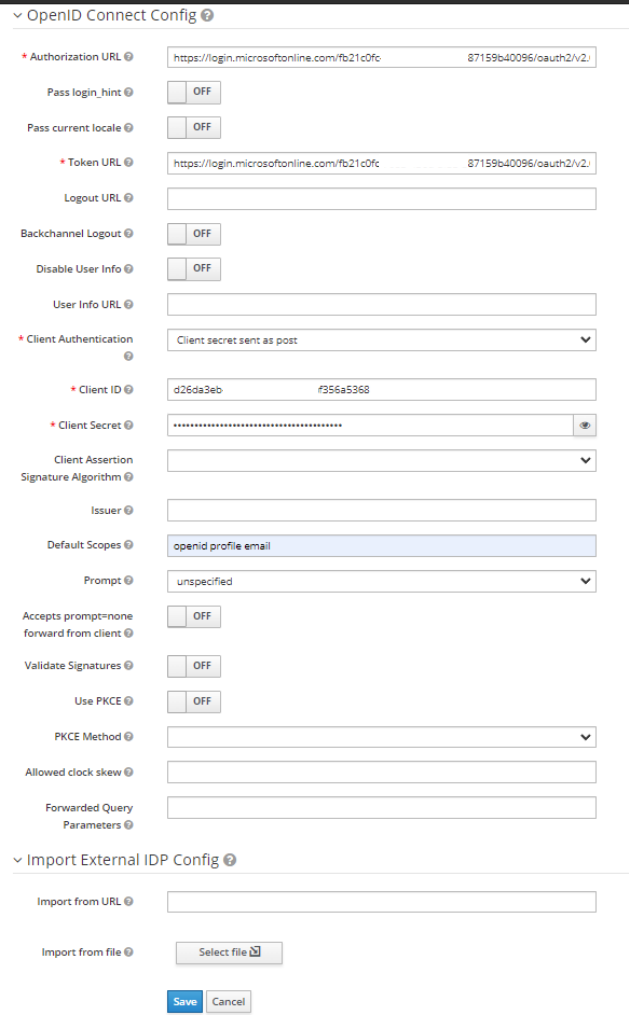
- Click on Endpoints on next screen and copy the OAuth 2.0 authorization endpoint (v2) and OAuth 2.0 token endpoint (v2) to the associated fields in Keycloak

- Close the Endpoints window and copy the Application (client) ID to the Client ID section of Keycloak, setting the Client Authentication method to Client secret sent as post
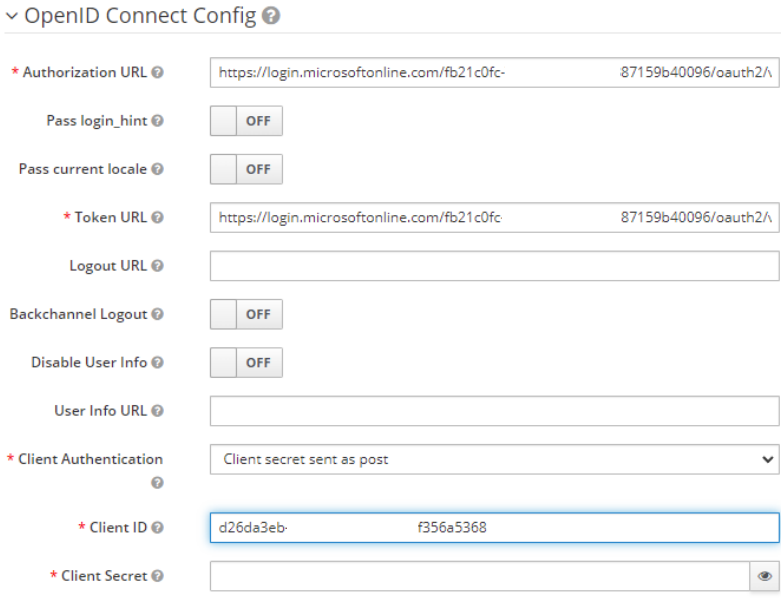
- A Client Secret is now required.
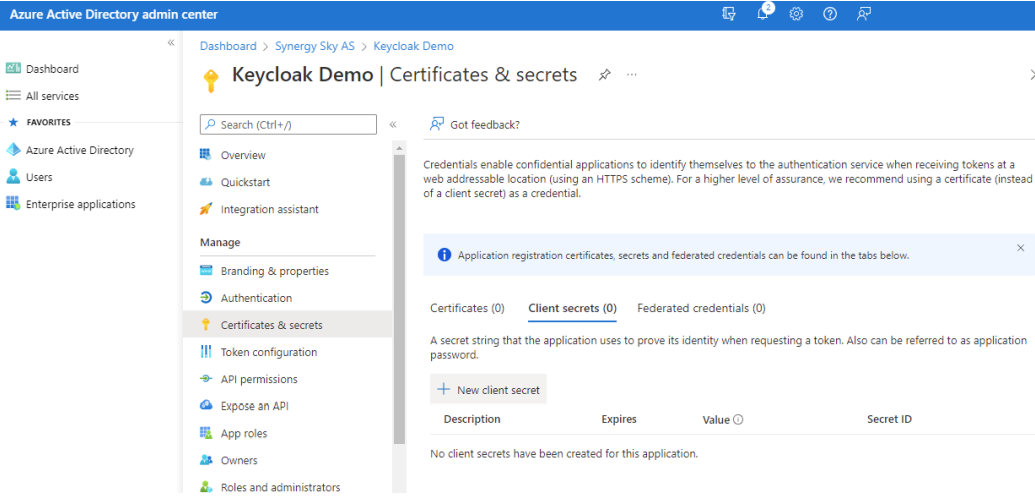
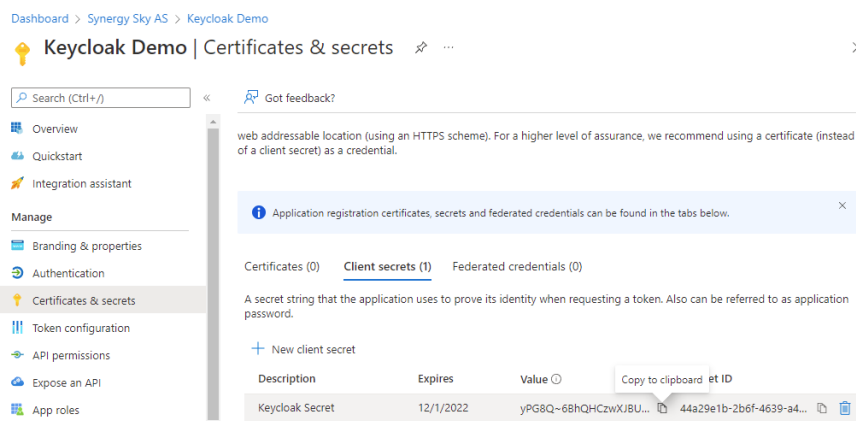
- In Azure AD, select Certificates & secrets and then click New client secret
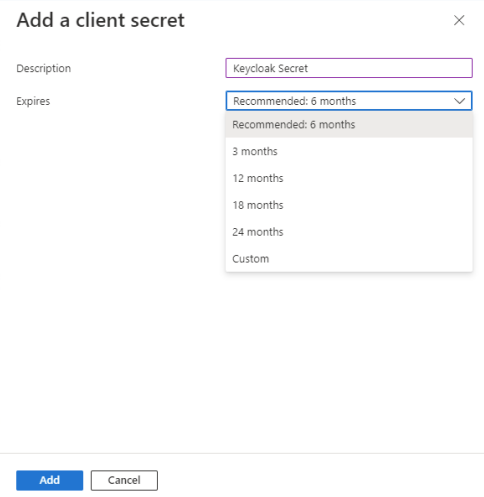
- Add a Description (E.g. Keycloak Secret) and set the Expires timeframe (N.B. make a note of this if needing to renew at a future time) then click on Add
- Copy the Value of the secret once done
- Paste the secret into the Client Secret section in Keycloak configuration and add some Default Scopes (E.g. openid profile email) and then click on Save at the bottom of the page.
Try and login to Synergy SKY Config Tool from a new private window or a different web browser. There should now be a button at the bottom saying “Azure AD” or whatever Display Name was specified in step 3. Click on the button and login using AD.


