Deploy Occupancy Sensors and Gateways
Introduction
This guide explains how to deploy gateways and sensors in a customer environment, and assumes that you have a login to the Synergy SKY IoT cloud platform, https://sensor.synergysky.com.
Prerequisites
| Cloud configuration |
Customer added
The customer has been added to the Synergy SKY IoT cloud administration interface by Synergy SKY support.
Provisioning Profile
A device profile must be added to the customer level before starting to provision using the app.
Client ID and Secret
The Client ID and Secret have been provided to you by your Synergy SKY representative.
|
| Gateway Hardware |
Power supply options:
- Micro-USB), 3.3 VDC +/- 5%
or
- PoE adapter
Note: Power supply is not provided by Synergy SKY.
|
| Mobile Device for App |
Android-based mobile device with
- Android version 8 or newer
- NFC capabilities
- Internet access
- The Synergy SKY provisioning app installed. Download it from here.
|
Configuration Reference
Step-by-Step Guide
Configuration Preparations
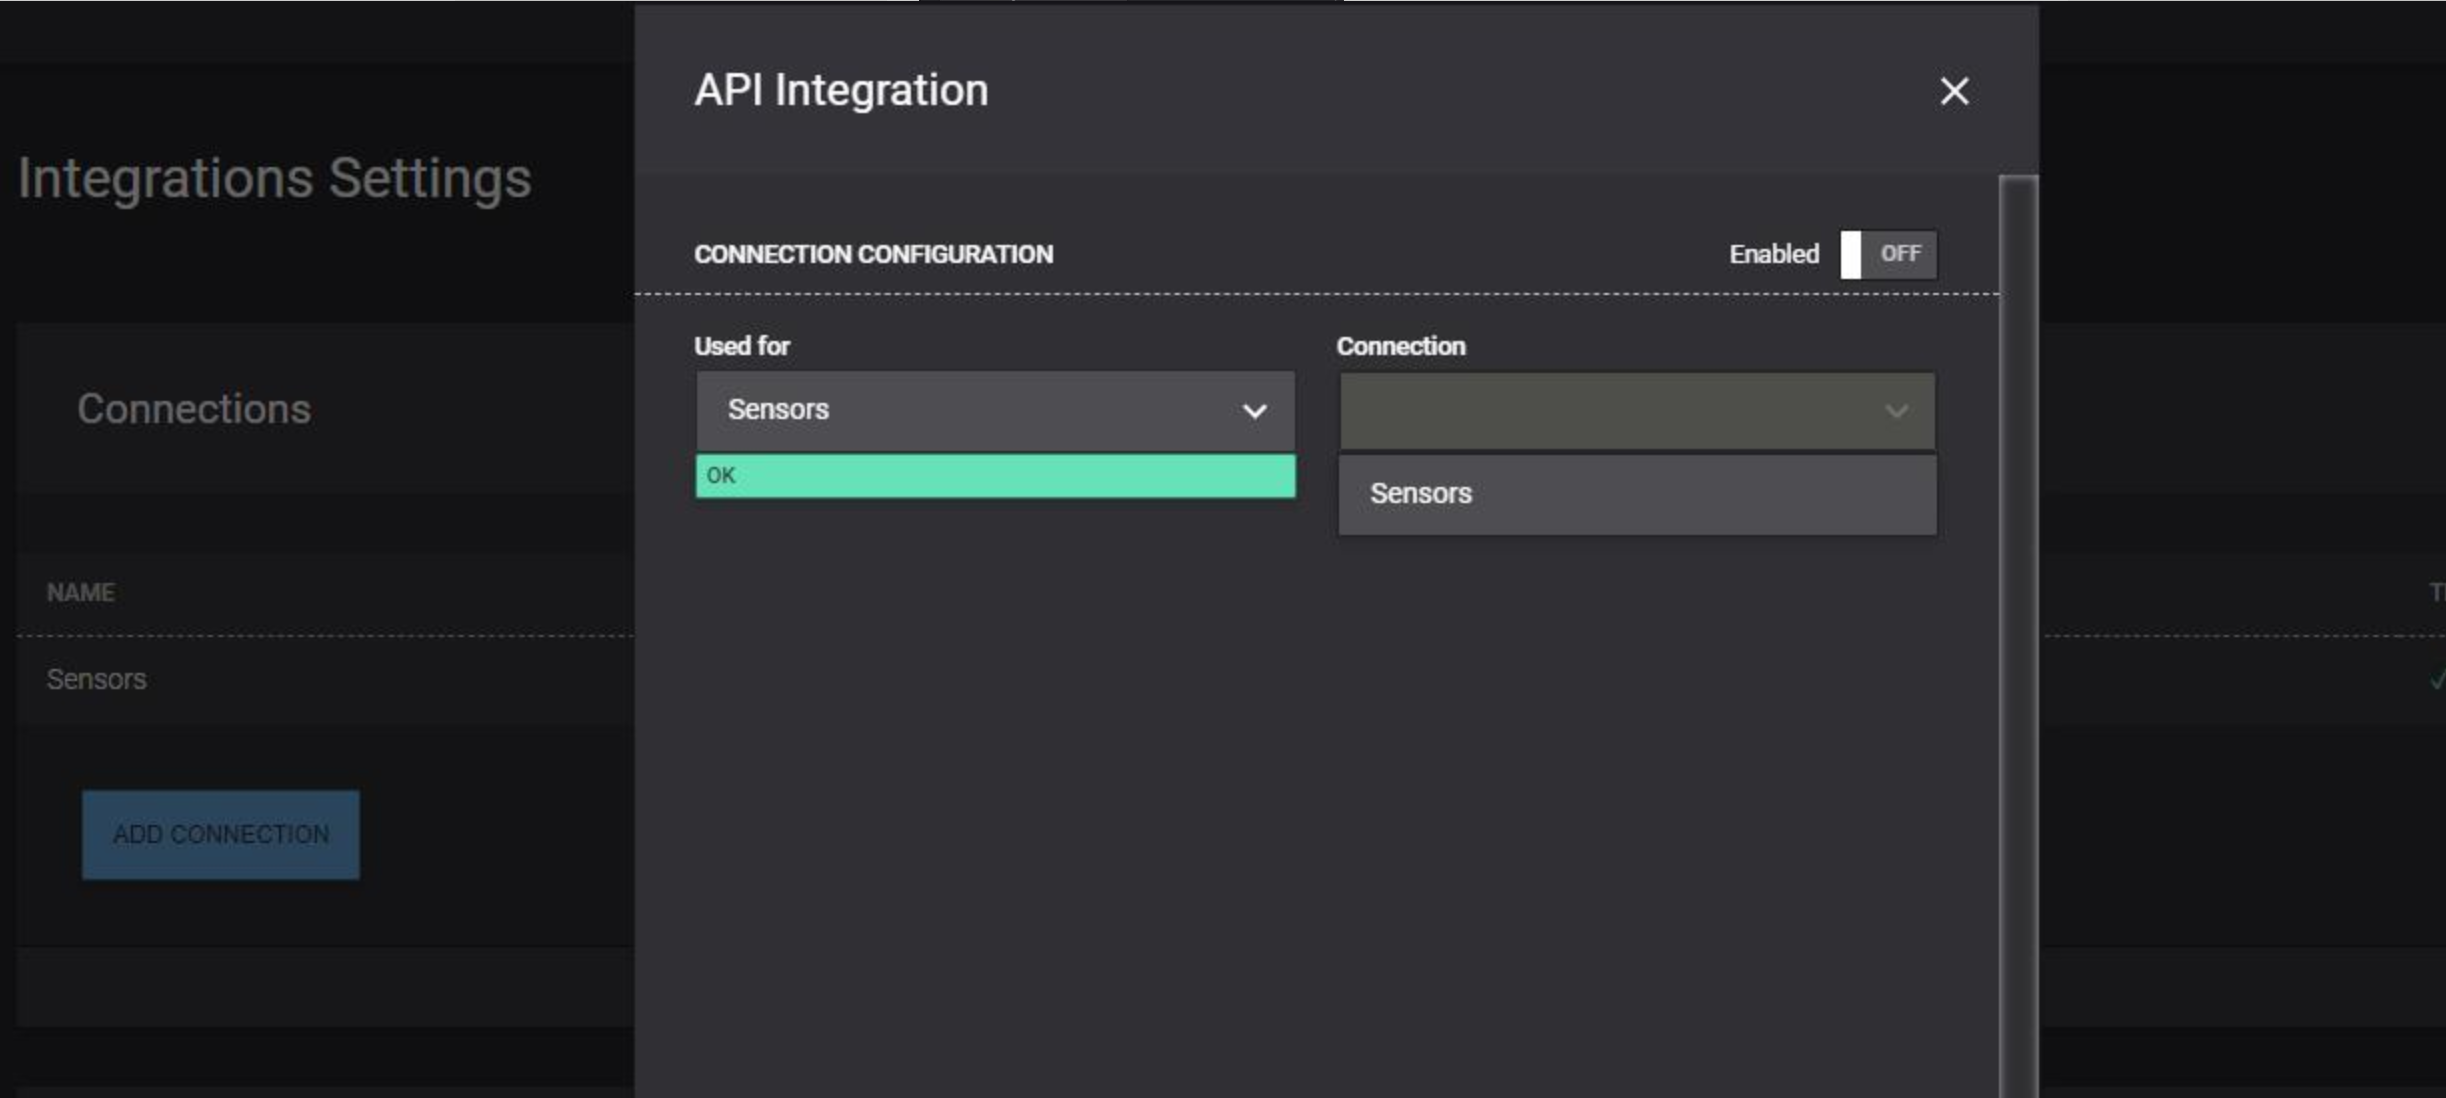
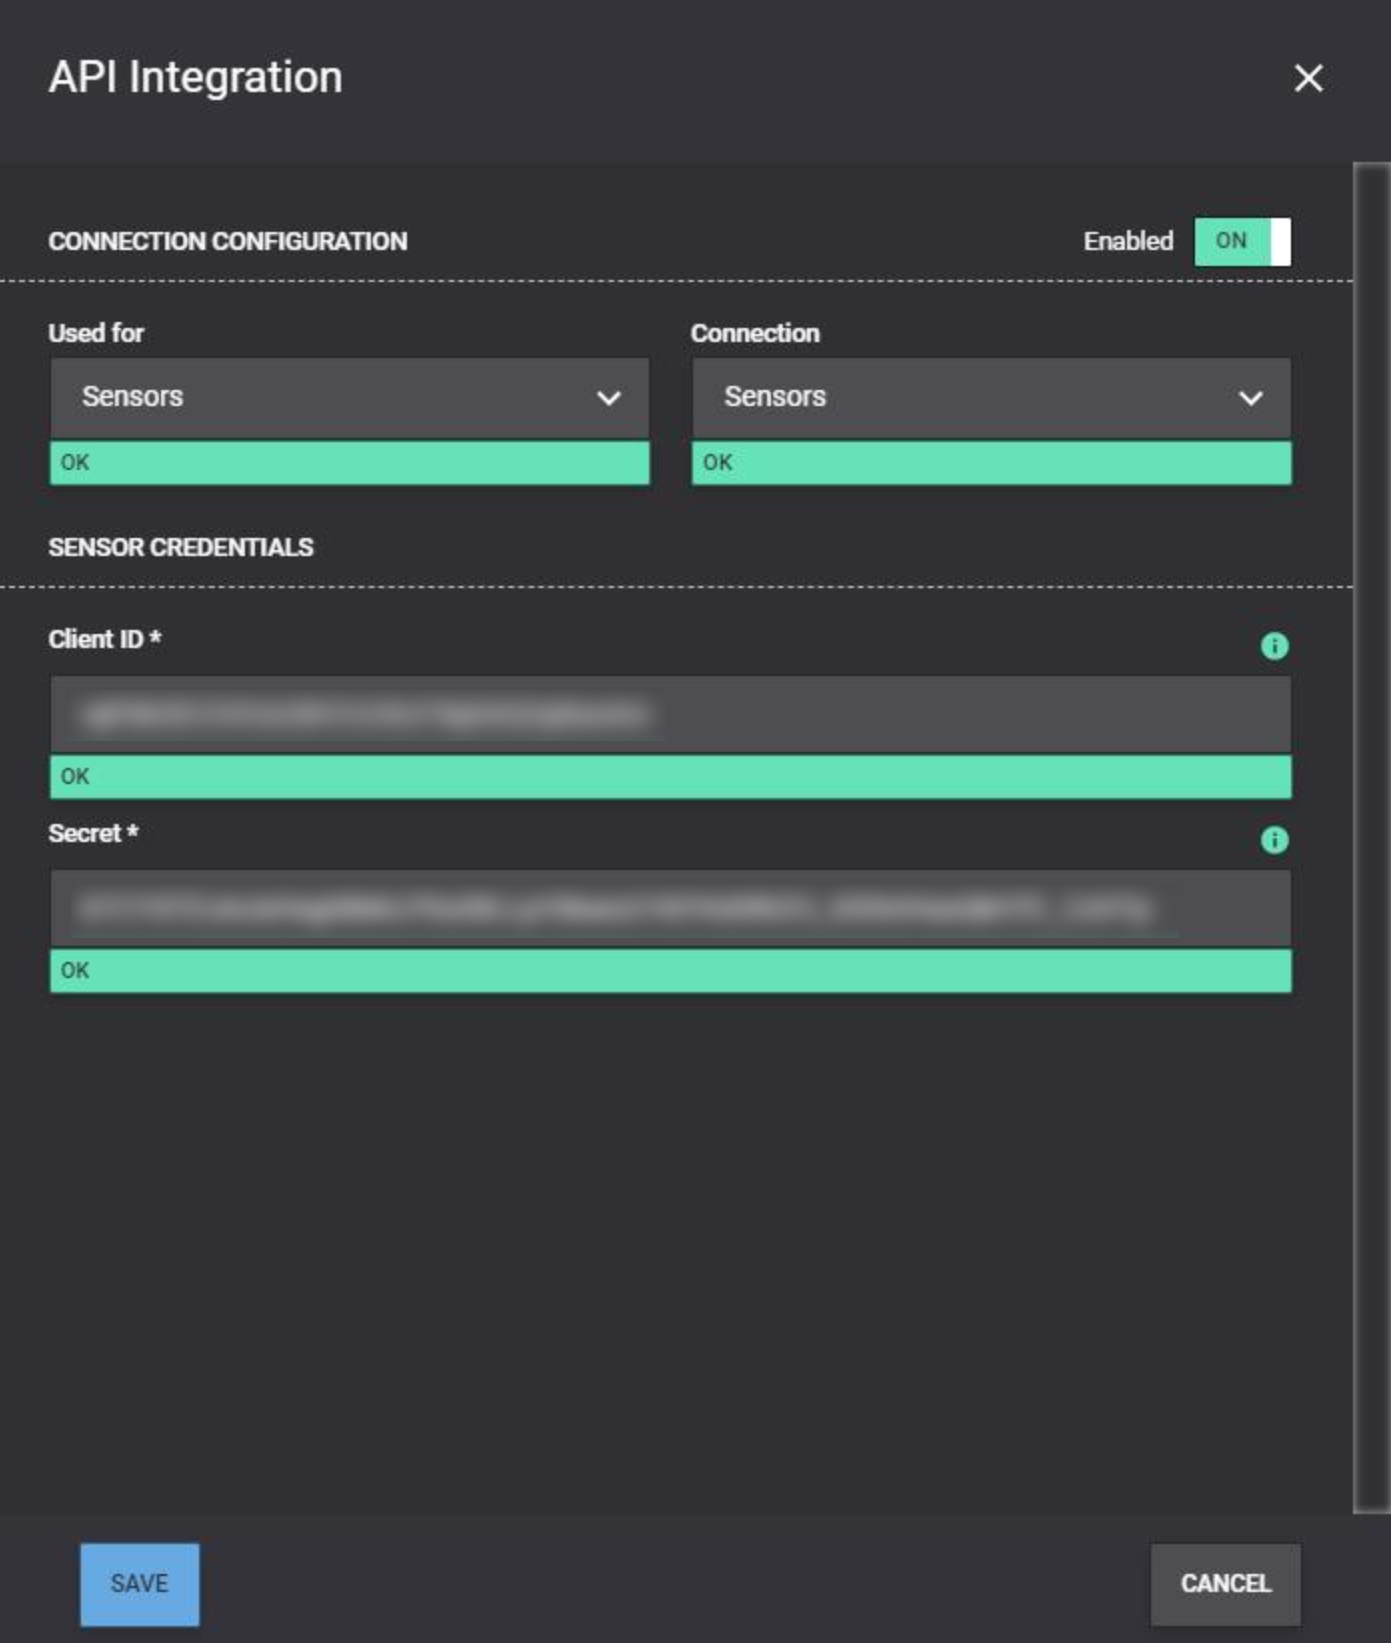
- In the Synergy SKY configuration tool, you will need to add a new connection and API integration towards the Synergy SKY IoT Cloud. Go to GENERAL SETTINGS > Integration Settings and add a new connection. Fill in the Client ID and secret as provided by your Synergy SKY representative
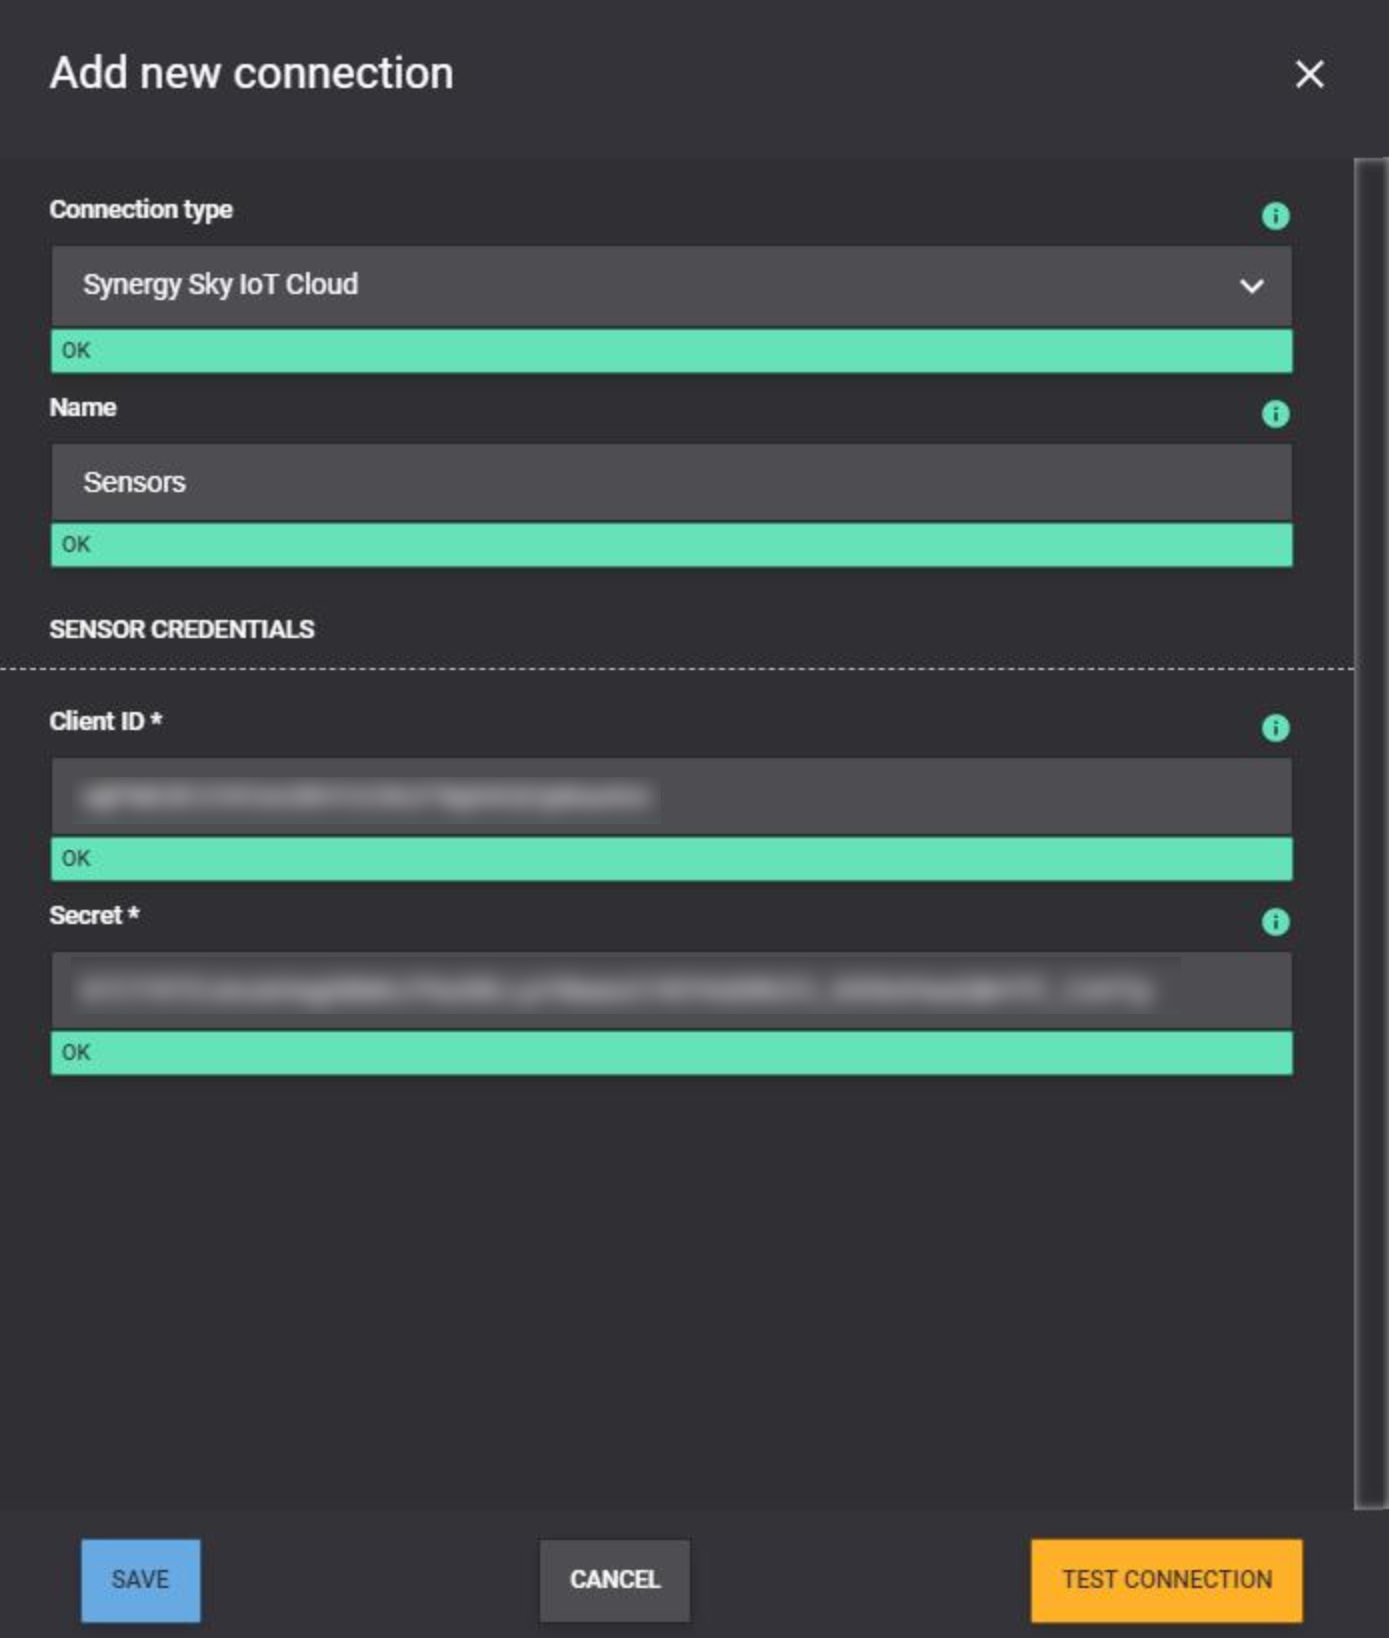
- Click Save
- Then, add a new API integration and choose the connection you just added
Hardware Preparation
Gateway
- Mount the antenna
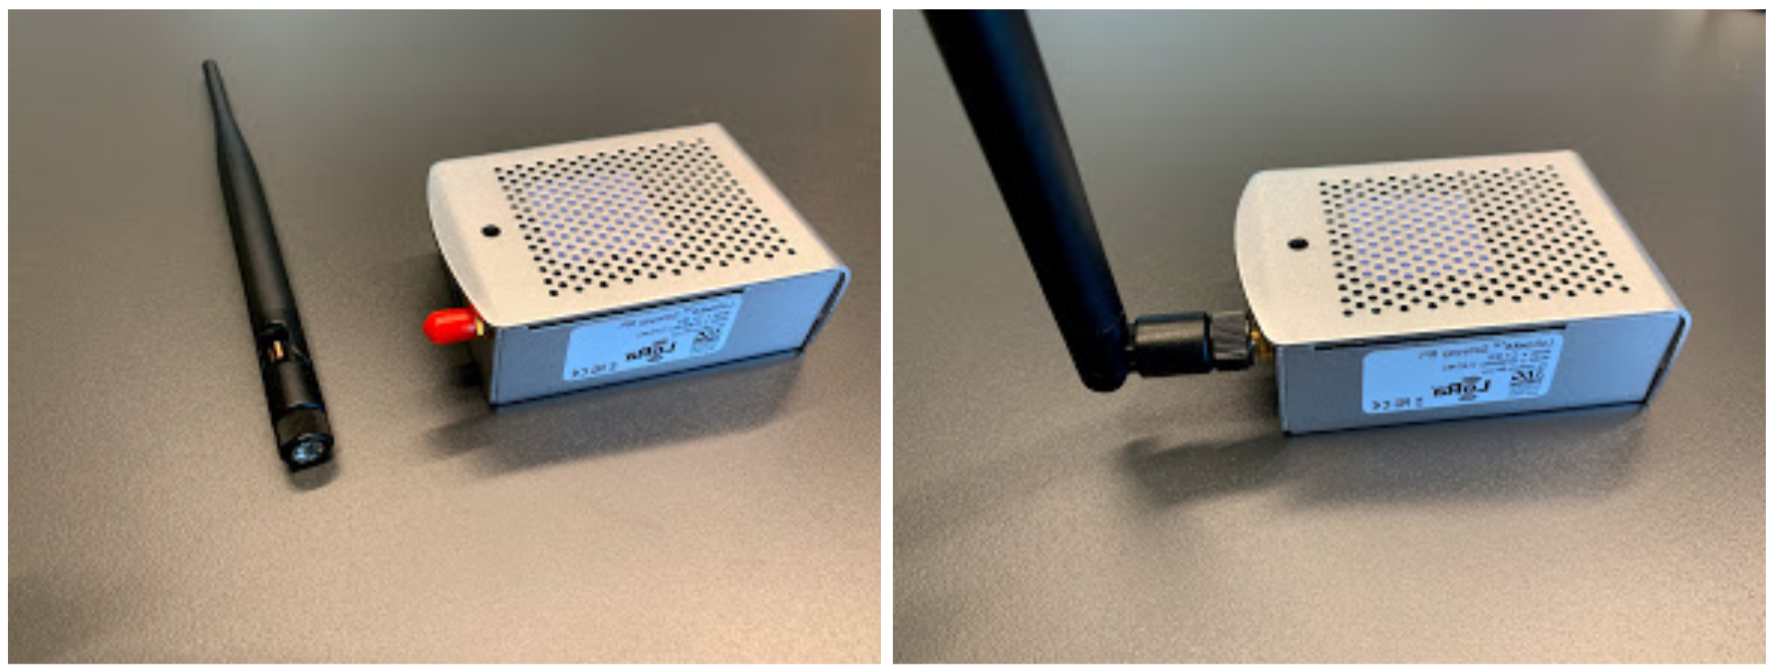
- Plug it into power, either with a POE adapter or with an micro-USB external power source
- Connect it to a network with Internet access
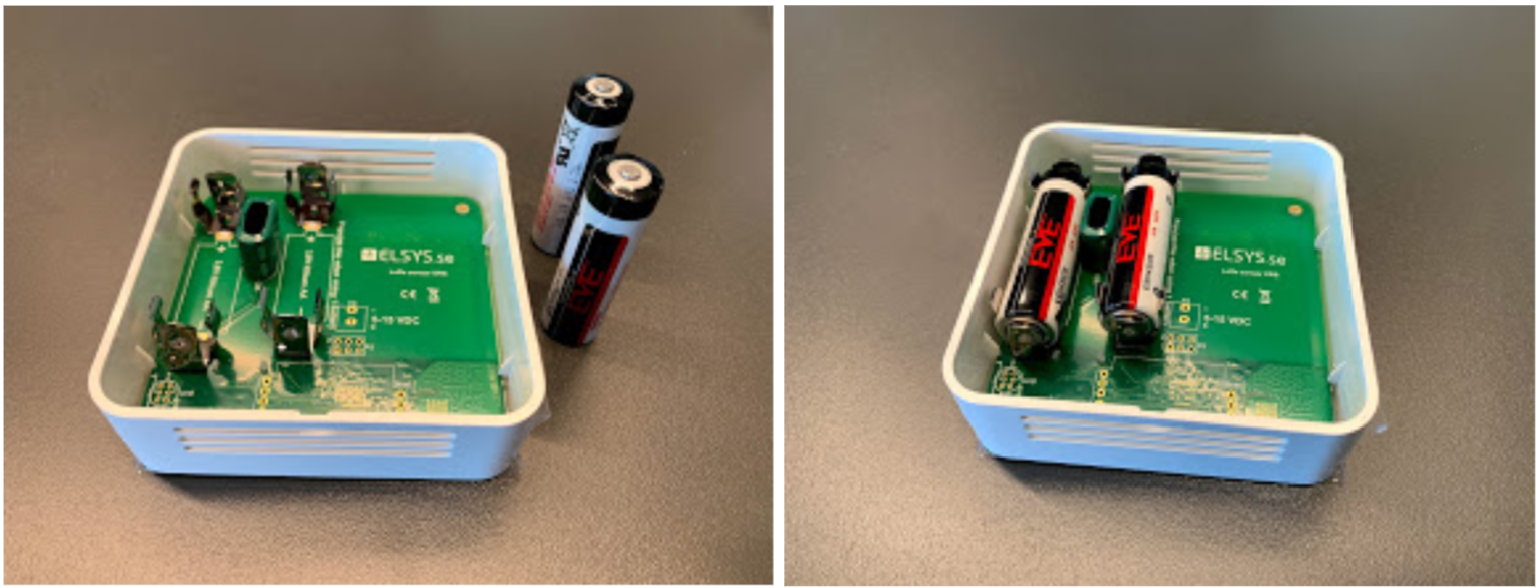
Sensors
- Open the sensor and mount the batteries
Logging into the App
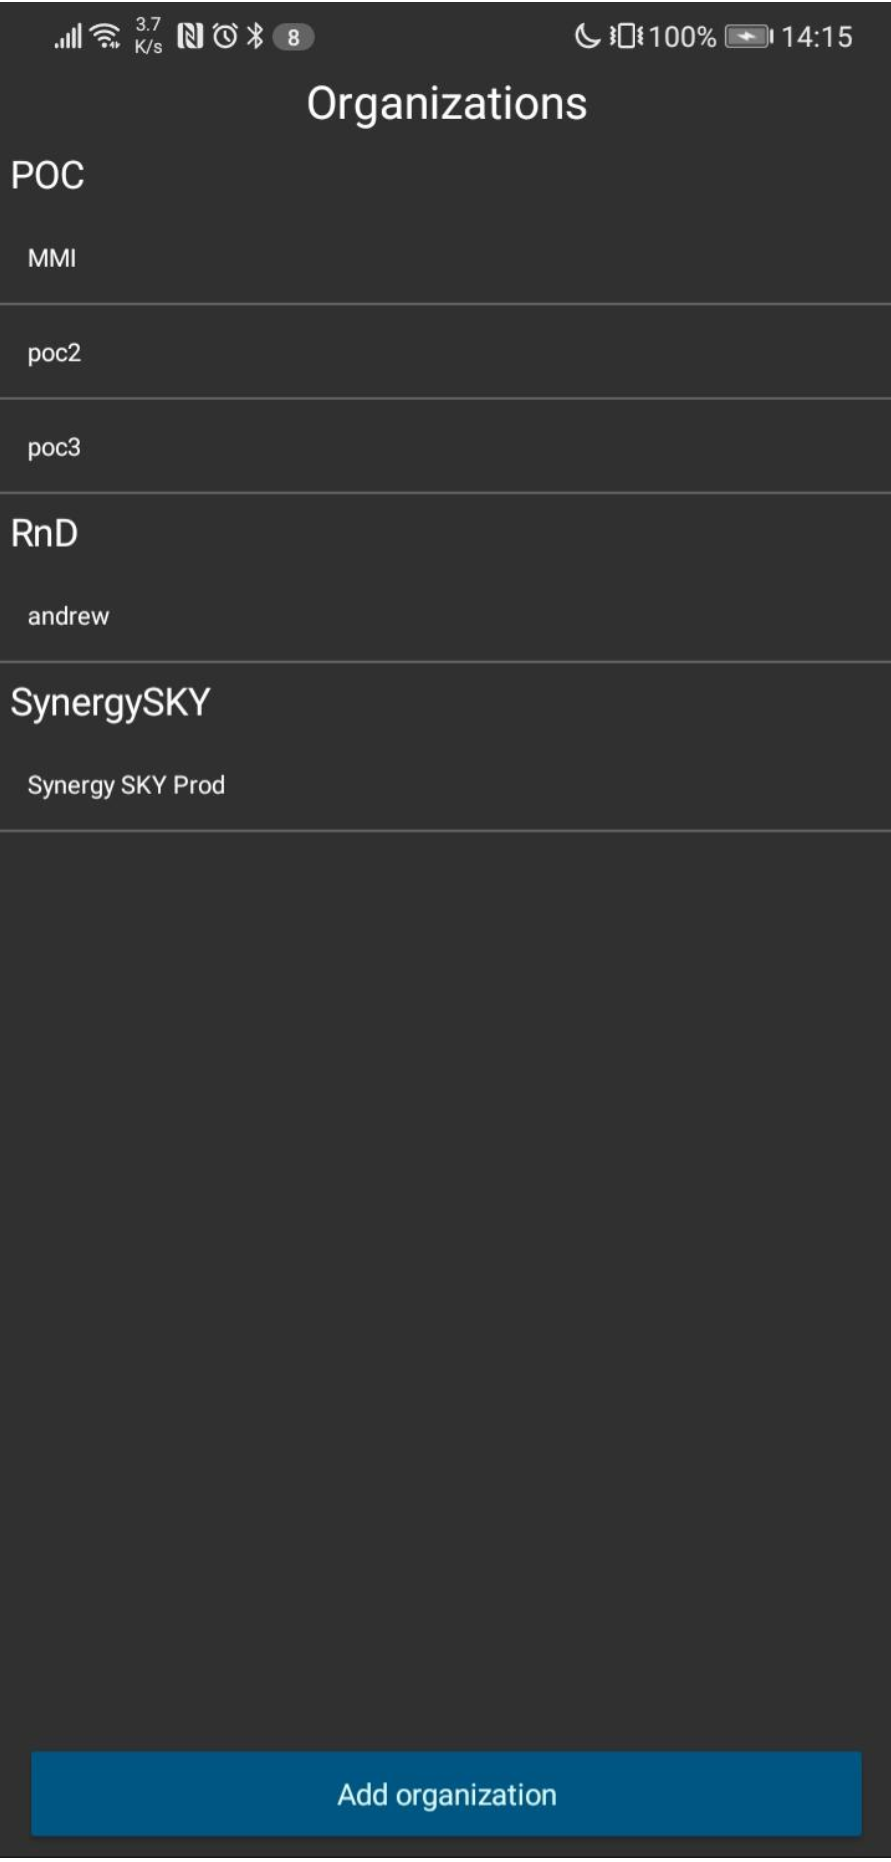
- Start by logging into the app with the credentials you have been provided with
- Once logged in, select the correct level in the tenant structure
Provisioning the Gateway
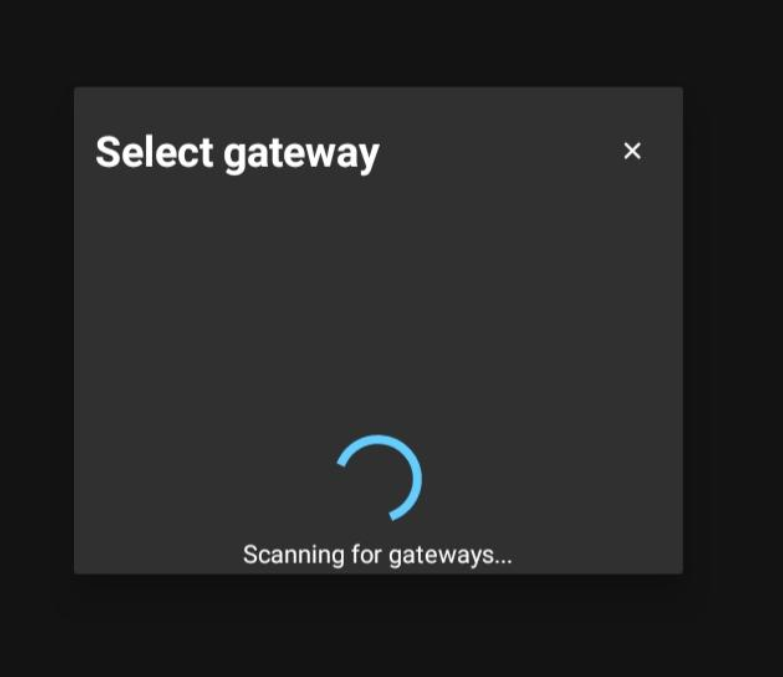
Note: The gateway needs to be connected to the network in order to be discovered by the app.
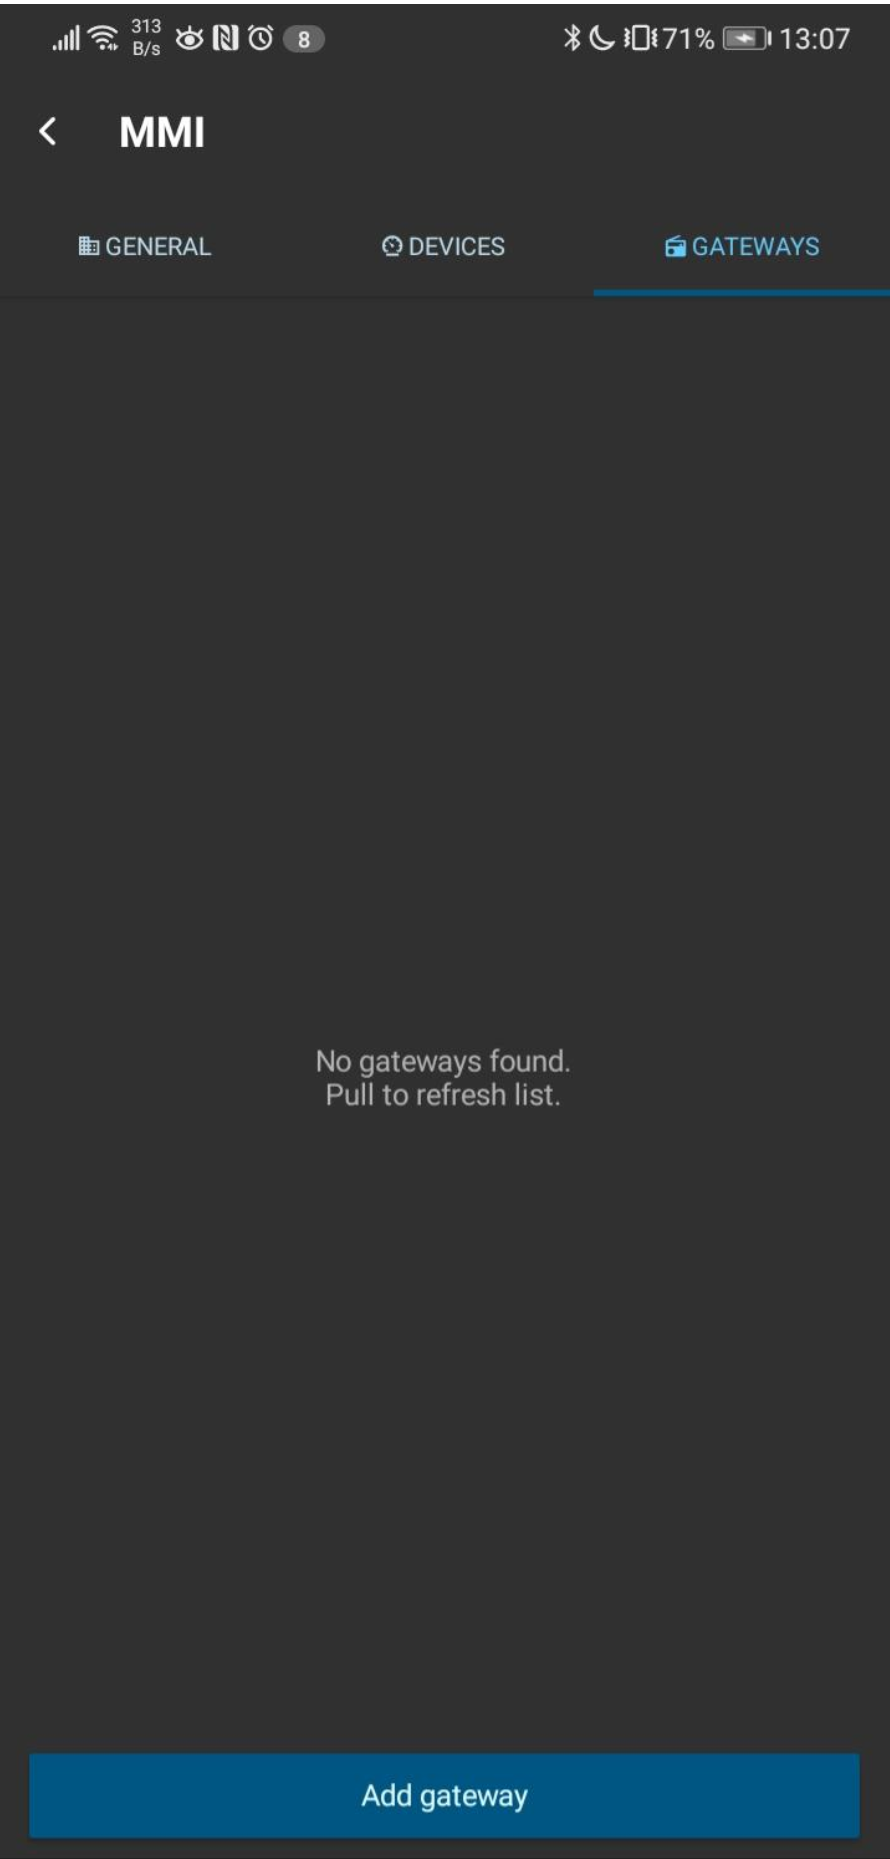
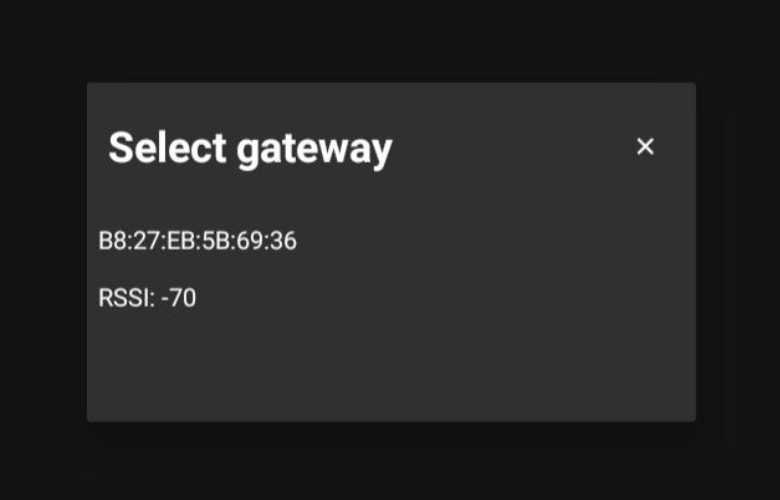
- On the customer level, click the Gateways tab and click Add Gateway
- When the gateway is discovered, click it to add it and click Save
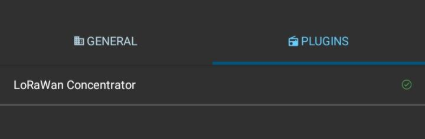
- After the gateway is added, you will need to enable the LoRaWan Concentrator plugin and select the correct frequency plan:
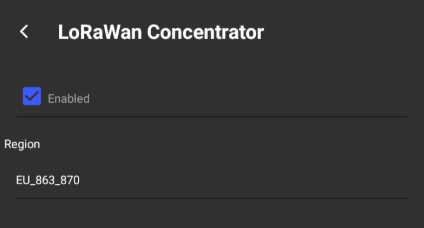
Note: Consult the LoRa Alliance website to identify the correct frequency plan/region for the gateway.
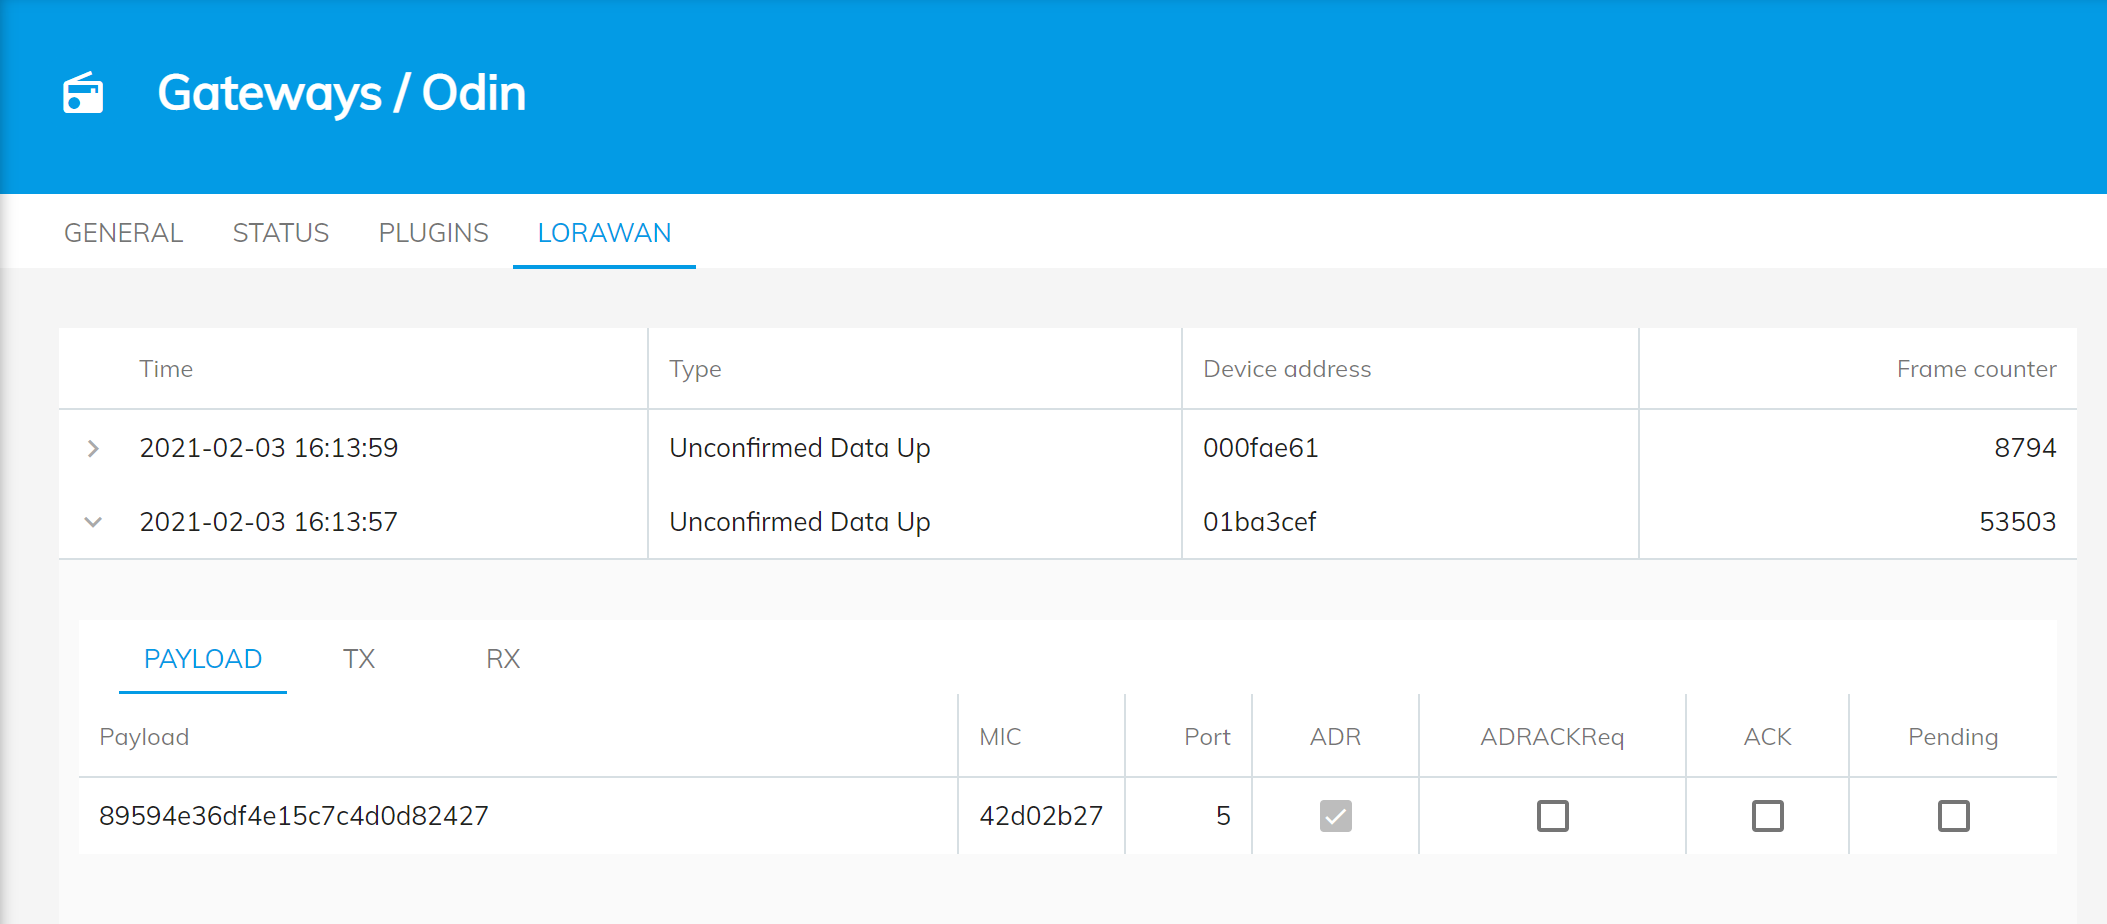
- The gateway should start sending data shortly. The cloud web interface should then say that the gateway is connected and start reporting data in the LORAWAN tab

Provisioning the Sensors
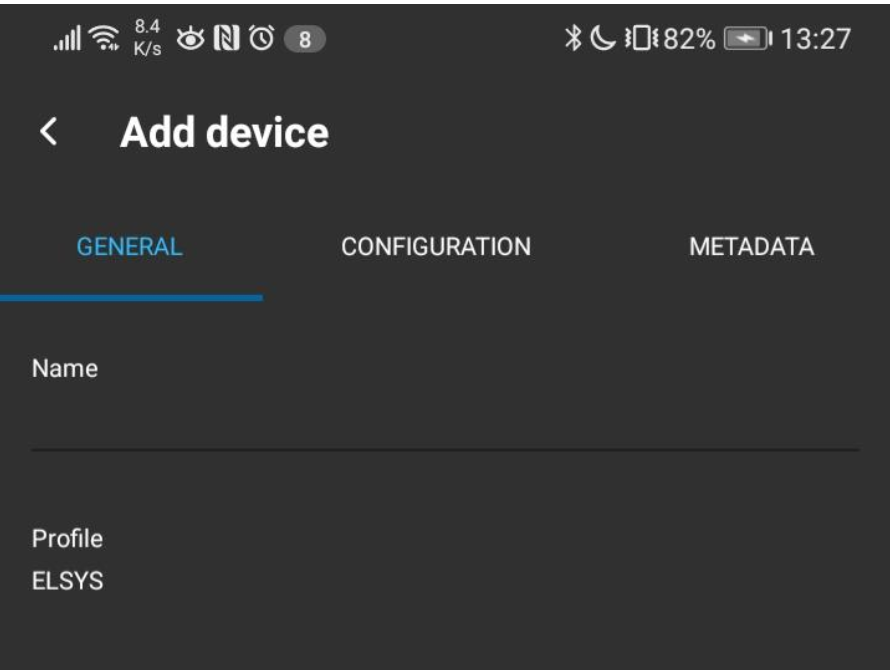
- On the customer level, click the Devices tab and click Add Device

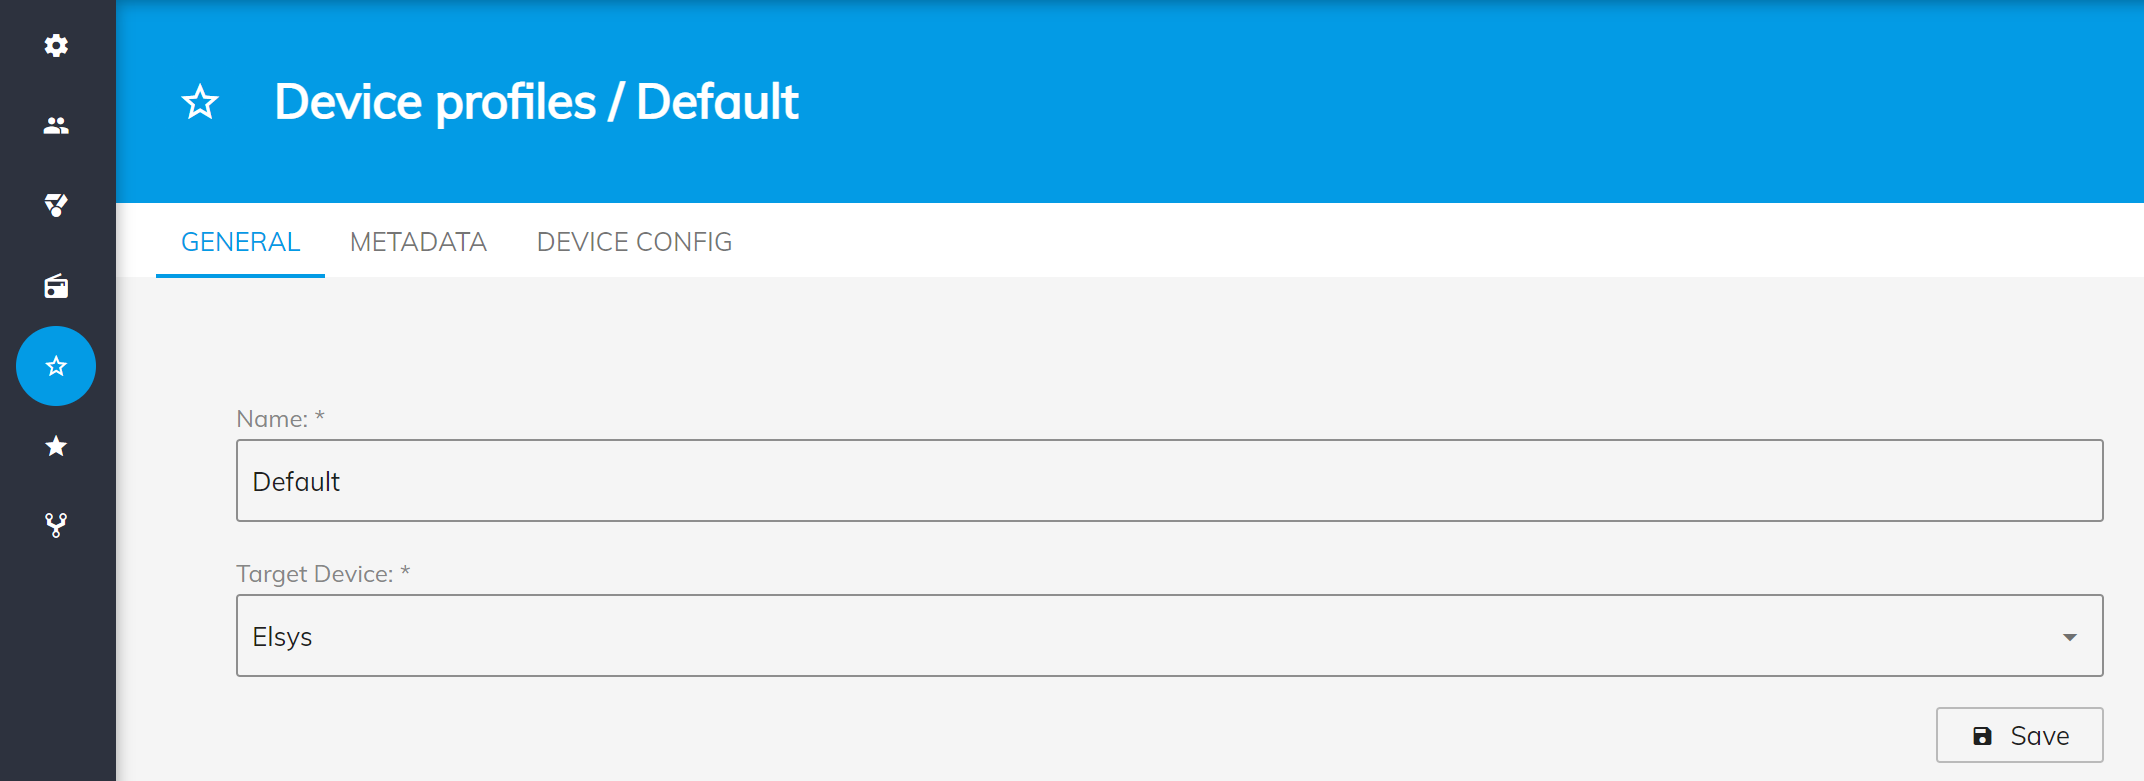
- In the GENERAL tab, specify the name of the sensor (e.g. "Room 301") and select the device profile that has been specified for this customer:
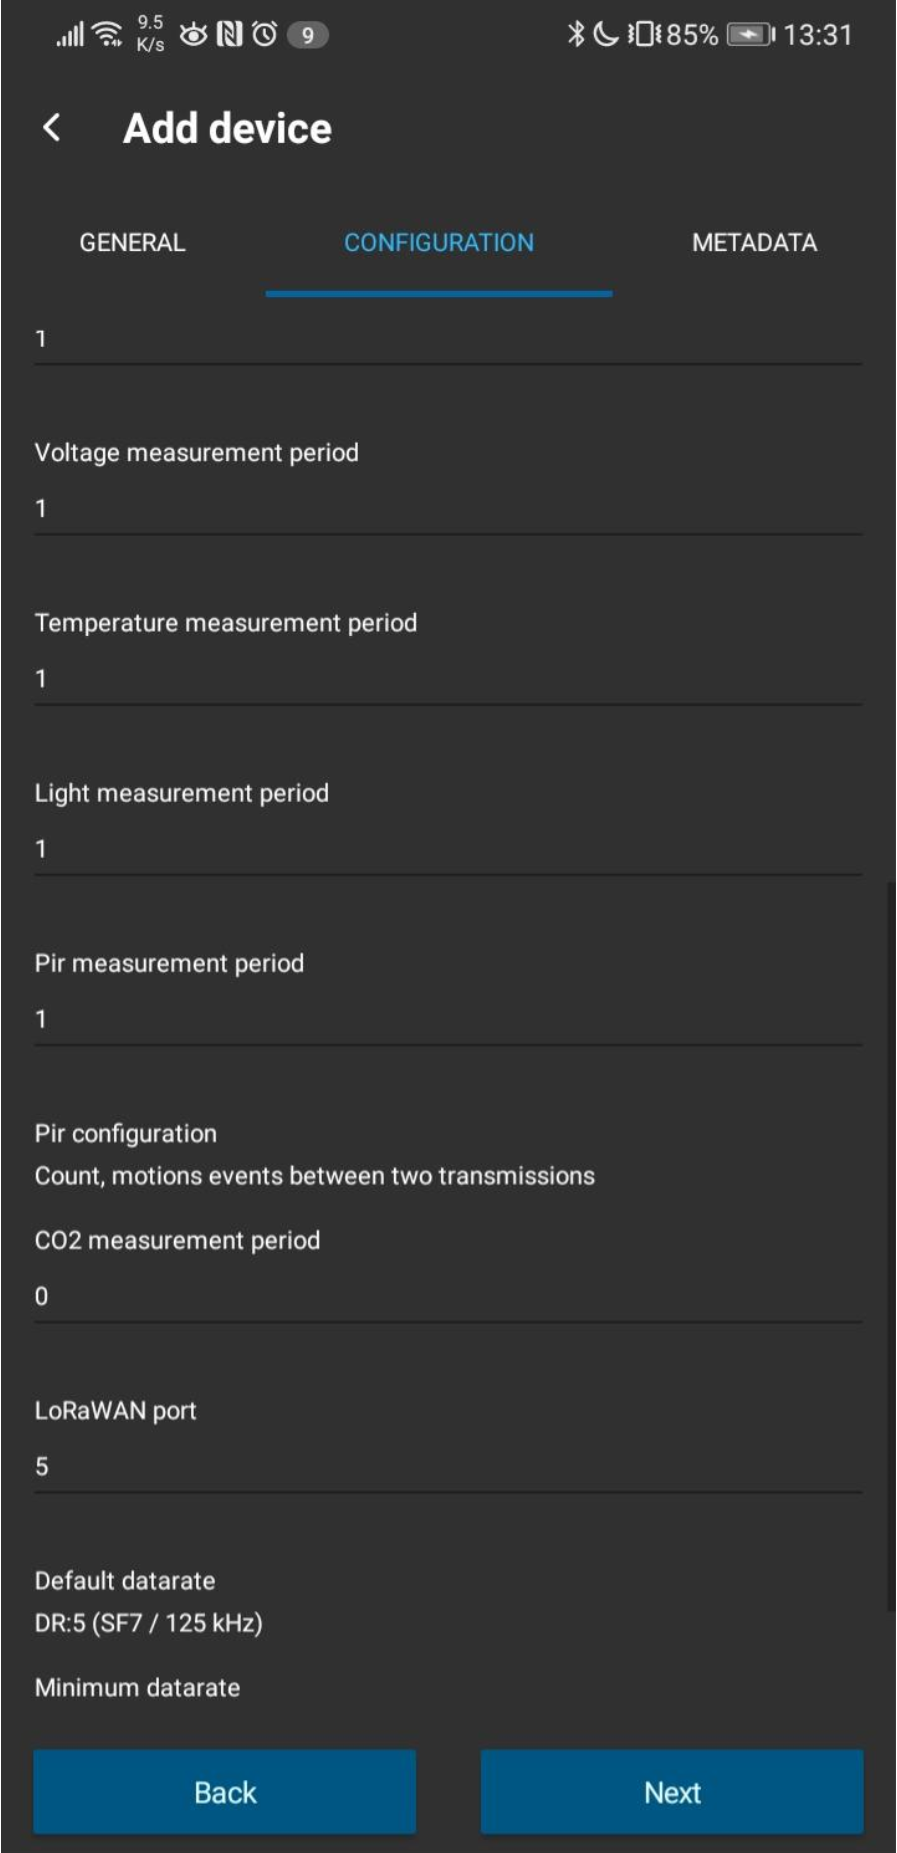
- Click the CONFIGURATION tab and hold your mobile device near the sensor until it discovers the sensor. You might need to try several positions and angles before your mobile device detects the sensor, depending upon the location of the NFC antenna on your mobile device:
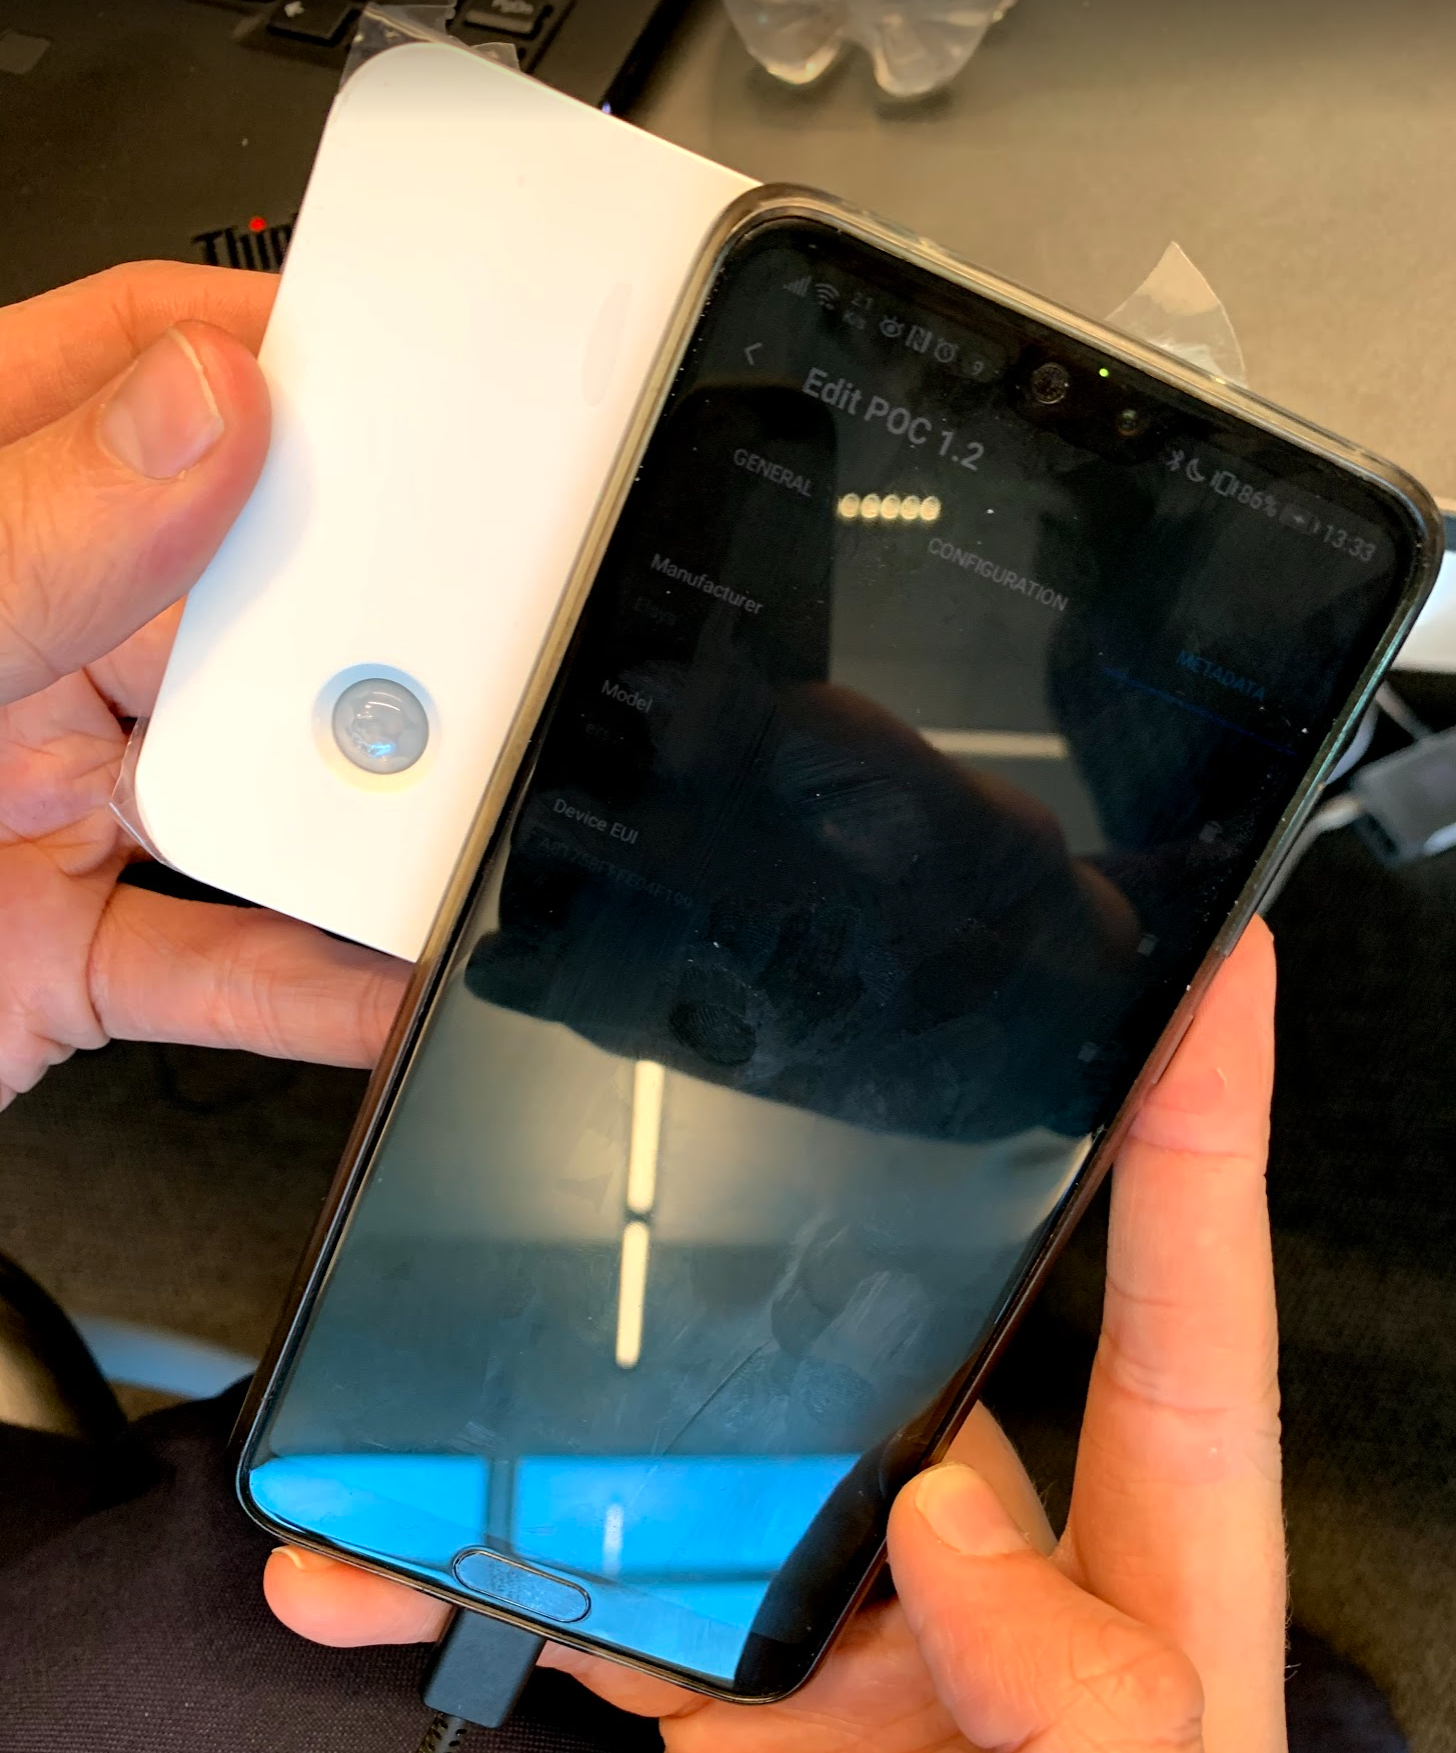
- Once the sensor is discovered, the CONFIGURATION and METADATA tabs will be populated with the sensor data.
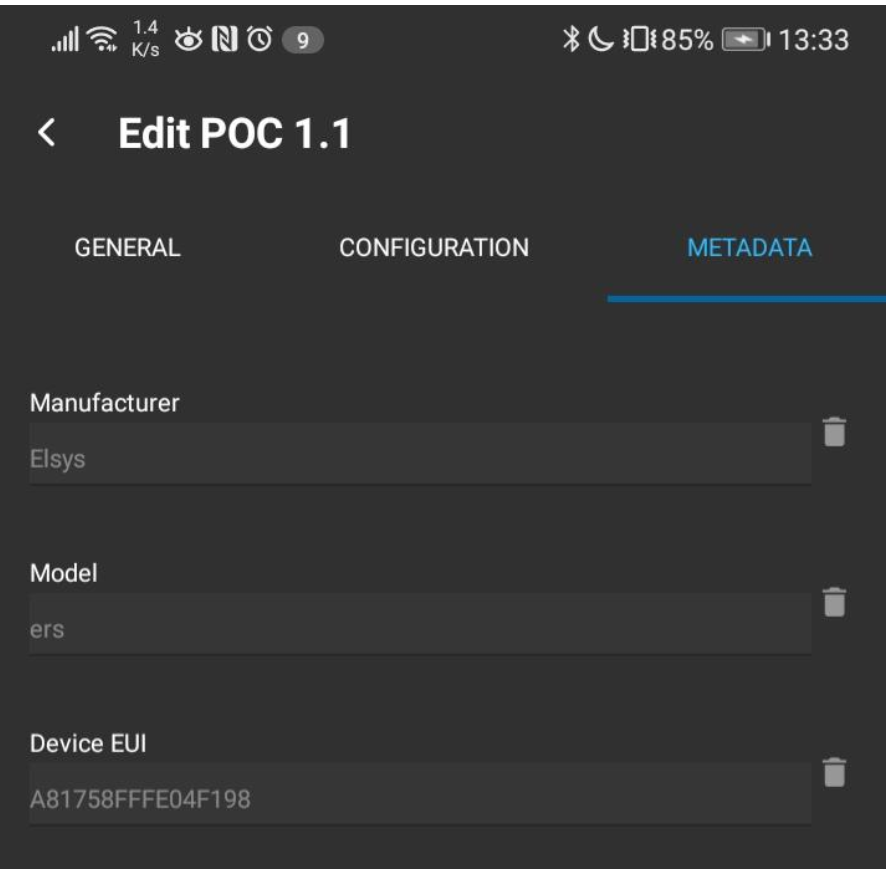
- You may add more metadata to the sensor if needed. E.g. "Building A" and "Floor 12" etc.
Verifying that the Sensors are Sending Data
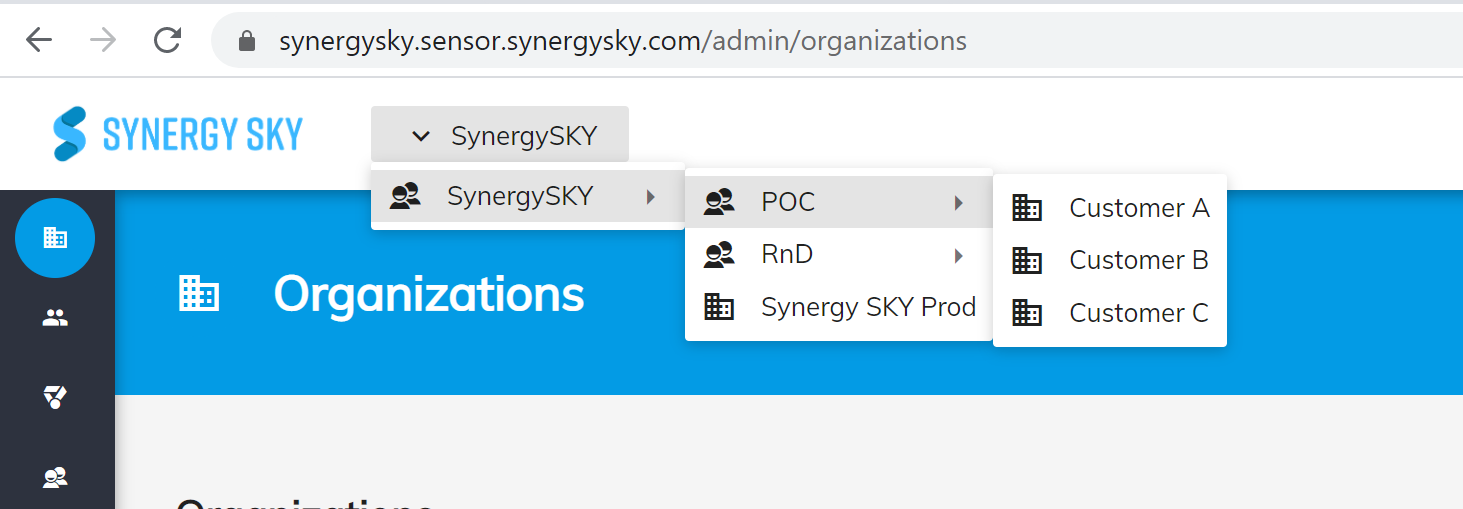
- Log onto the Synergy SKY IoT Cloud and locate the customer in the topmost dropdown list
- Click Devices from the menu
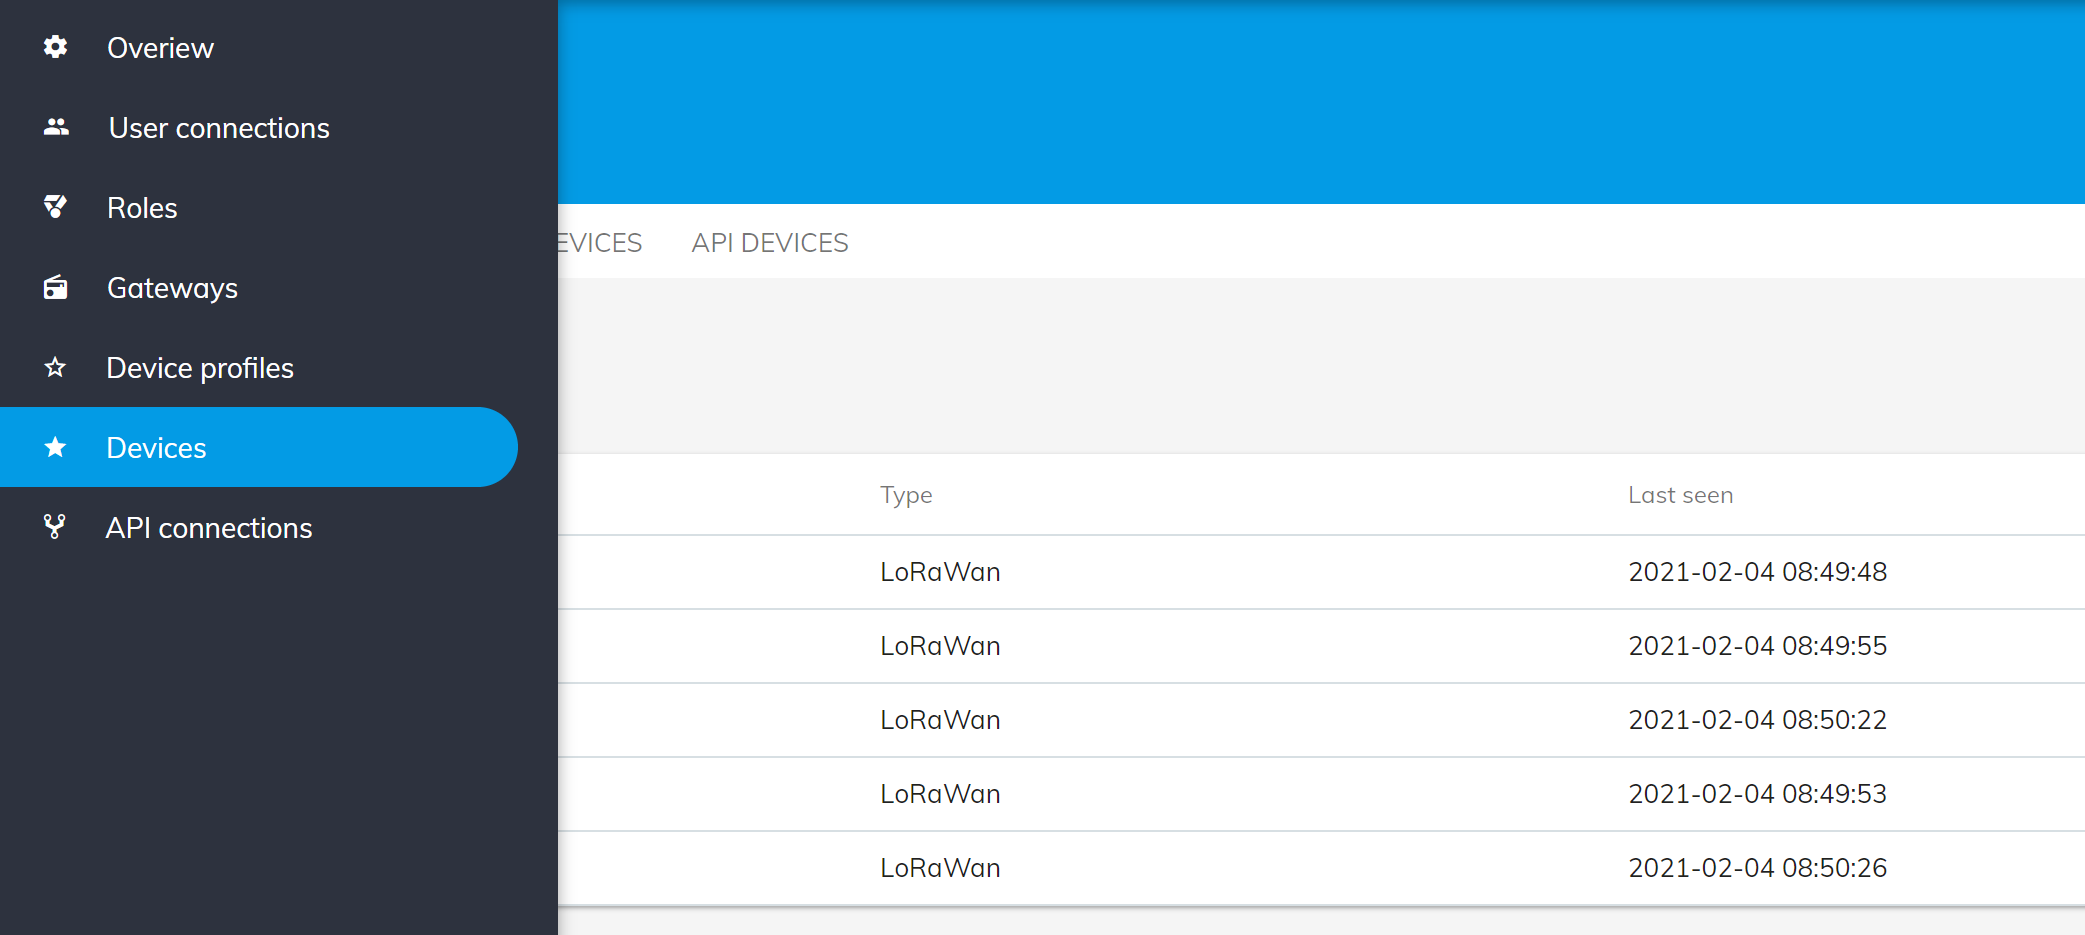
- You should now see your devices
- Click one of the devices and click the INSTRUMENTS tab
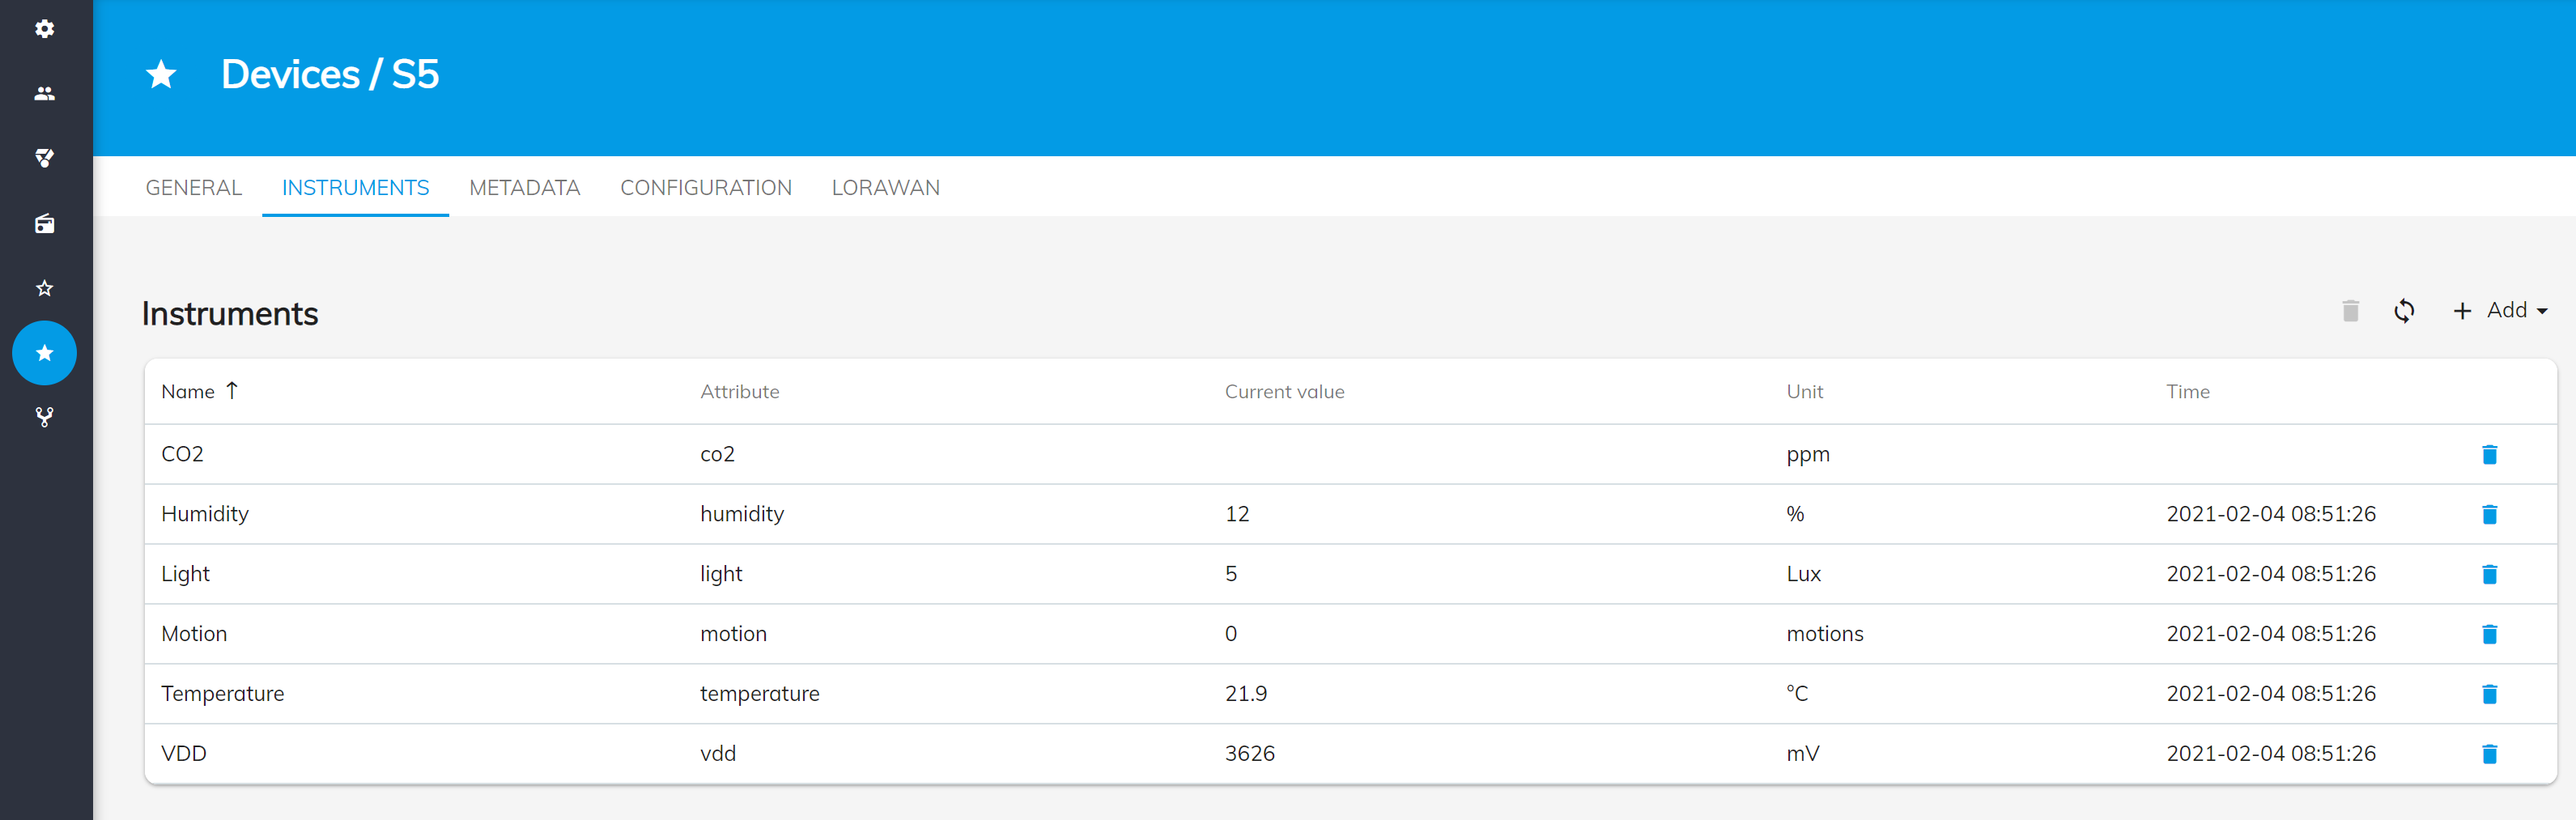
- Here you can see the sensor data that the device is reporting
- You can view the device's meta data in the METADATA tab and view its configuration as specified in the device profile in the CONFIGURATION tab. Configuration may be overridden for each individual sensor.
Connecting the Synergy SKY Management Suite to the Sensor Cloud
Once you have added the sensors, it is time to associate them with the meeting rooms you have added to the Synergy SKY configuration tool.
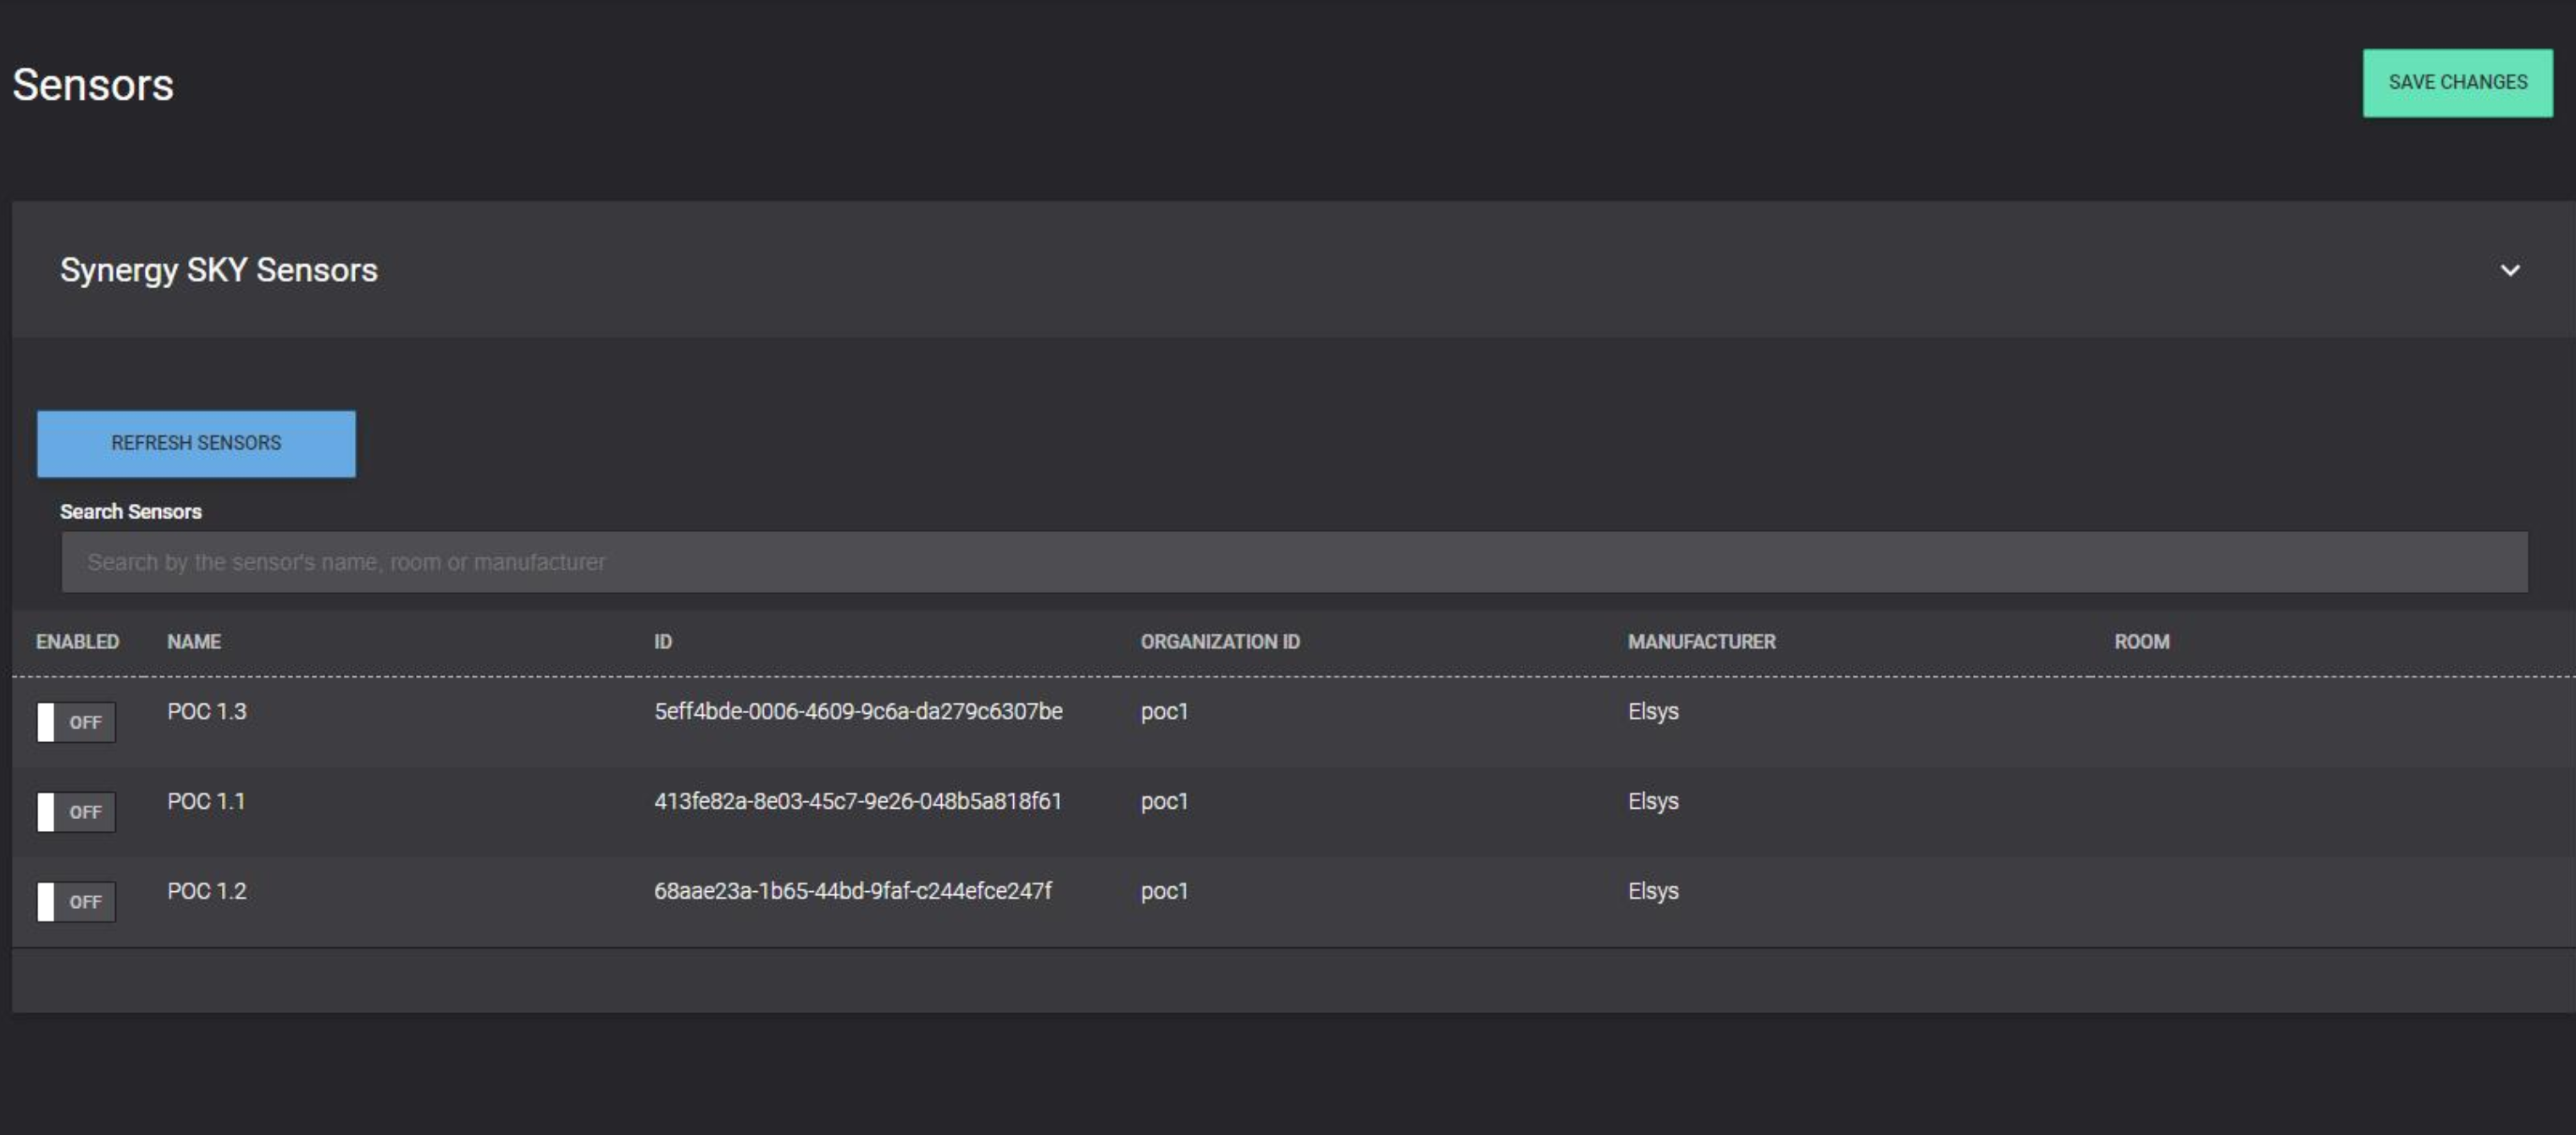
- First, check that the Synergy SKY platform can connect to the cloud. Go to GENERAL SETTINGS > Sensors and click the Refresh Sensors button. You should now see the sensors that you have provisioned
- The next you will have to do is associate the sensors with the rooms. You can follow this guide to continue with this configuration.
Jump to...


