Add Webex Control Hub Integration for Webex Registered Endpoints
Introduction
This article will provide your team with a method of adding Webex Control Hub registered Video Systems to your Synergy SKY Management Suite. It's a streamlined process to add multiple Video Systems to the Suite without the need to create additional accounts on each endpoint.
Note: This should be done from a computer with access to the Suite.
Prerequisites
| Service Account |
This account will be used for the Webex developer account
|
| Webex Developer account |
This account can be created at developer.webex.com for free. It will be used to create the integration needed for this article
|
| Synergy SKY Suite 30.01 |
Minimum Version 30.01.1706
|
| Endpoint Registration |
Register endpoint as workspace
|
| Network/Firewall |
Ensure that your SUITE server can reach admin.webex.com
|
Configuration Reference
Step-by-Step Guide
Prepare Integration within Suite
We'll start this journey by preparing some information in the Suite that we'll need later. This should cut down on the time the Webex page is waiting so we don't risk idling out of the creation page. Once this section is completed, keep the Suite open and begin the next section in a new tab, as we will be moving between the two.
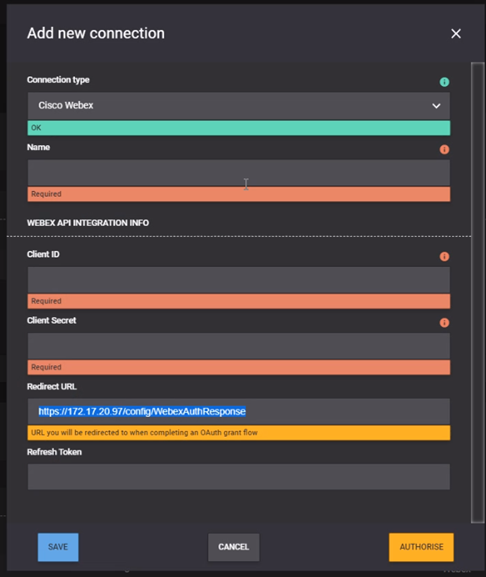
- In your SUITE, navigate to GENERAL SETTINGS > Integrations Settings
- Under "Connections", select "ADD CONNECTION"
- Select "Cisco Webex" from the "Connection type" drop-down
- Name your connection ("Webex Control Hub" or something similar works)
- A "Redirect URL" will autopopulate. Copy that address, keep this window open, and move on to the next section
Log in & begin creating Webex Integration
Now we will create the integration in Webex that the SUITE uses to connect with the Control Hub.
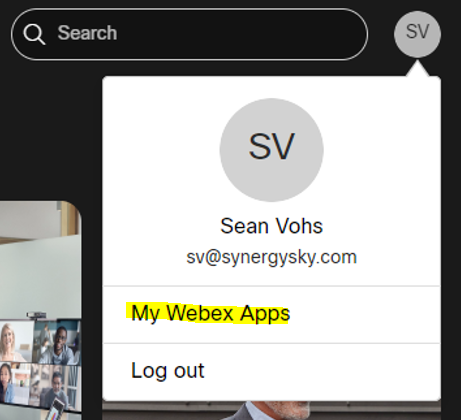
- In your browser, open a new tab and navigate to: https://developer.webex.com/
- Log in using your Webex admin account. This user/admin account needs to be in the same environment that your endpoints are registered to.
- From your account menu icon, select "My Webex Apps"
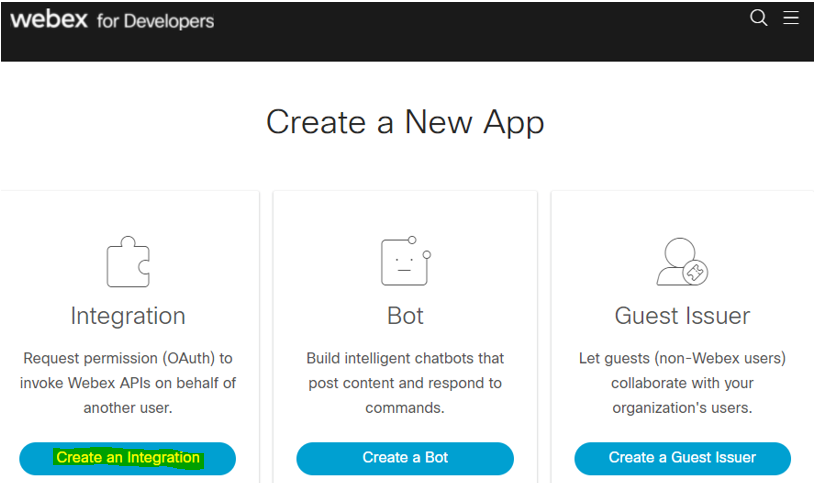
- Select "Create an Integration"
- The next page will ask for some basic information for your integration. The only one we require is "Will this integration use a mobile SDK?".
Select No
- Give your integration a name, contact email, icon, and description for your reference, per your company guidelines.
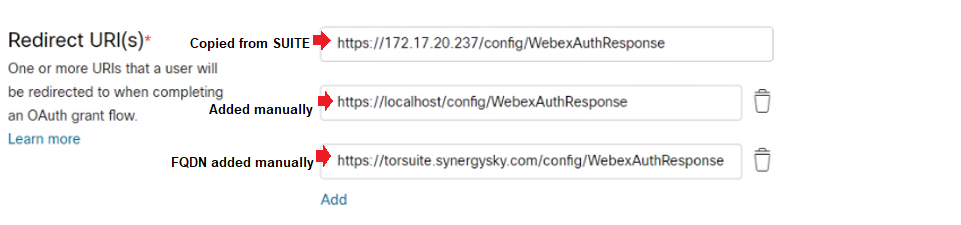
- Paste the previously copied "Redirect URL" from the Suite into the "Redirect URI(s)" field
- Under "Redirect URI(s)", click "Add"
- Enter "https://localhost/config/WebexAuthResponse"
- You should now have one URI using an IP and one using localhost. Both should end with "/config/WebexAuthResponse"
- If you have an FQDN for the Suite, you can add that as well.
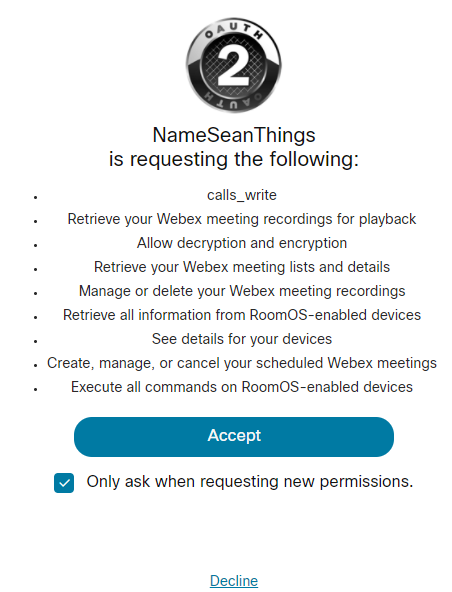
- Click the checkboxes next to the following scopes:
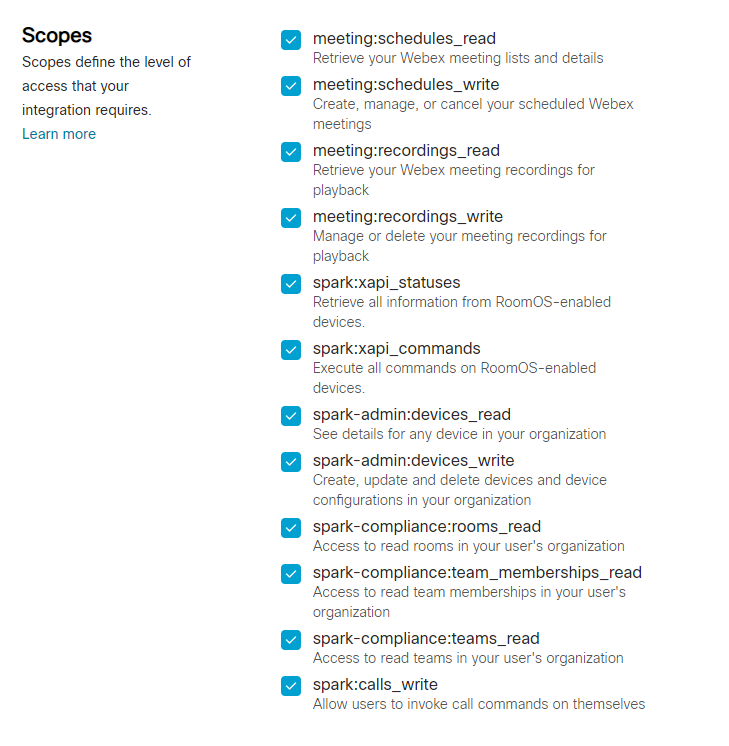
Listed:
-meeting:schedules_read Retrieve your Webex meeting lists and details
-meeting:schedules_write Create, manage, or cancel your scheduled Webex meetings
-meeting:recordings_read Retrieve your Webex meeting recordings for playback
-meeting:recordings_write Manage or delete your meeting recordings for playback
-spark:xapi_statuses Retrieve all information from RoomOS-enabled devices.
-spark:xapi_commands Execute all commands on RoomOS-enabled devices.
-spark-admin:devices_read See details for any device in your organization
-spark-admin:devices_write Create, update and delete devices and device configurations in your organization
-spark-compliance:rooms_read Access to read rooms in your user's organization
-spark-compliance:team_memberships_read Access to read team memberships in your user's organization
-spark-compliance:teams_read Access to read teams in your user's organization
-spark:calls_write Allow users to invoke call commands on themselves
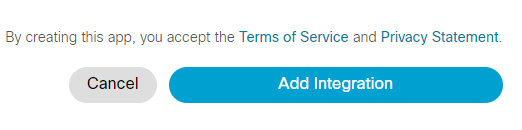
- Clicking "Add Integration" at the bottom will complete the creation of the Integration.
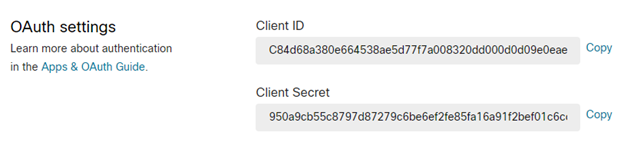
- On the following page, copy the OAuth settings provided. These are required for the next steps
Finish Webex Connection & API Integration in Suite
The following steps will move quickly and have a very short time limit to complete. Please pre-read this section so you can be prepared and not risk time-outs.
- Switch to your Suite tab
- The "Add new connection" pop-out should still be up for your Webex connection
- Paste the Client ID and Client Secret from the previous steps into the appropriate fields.
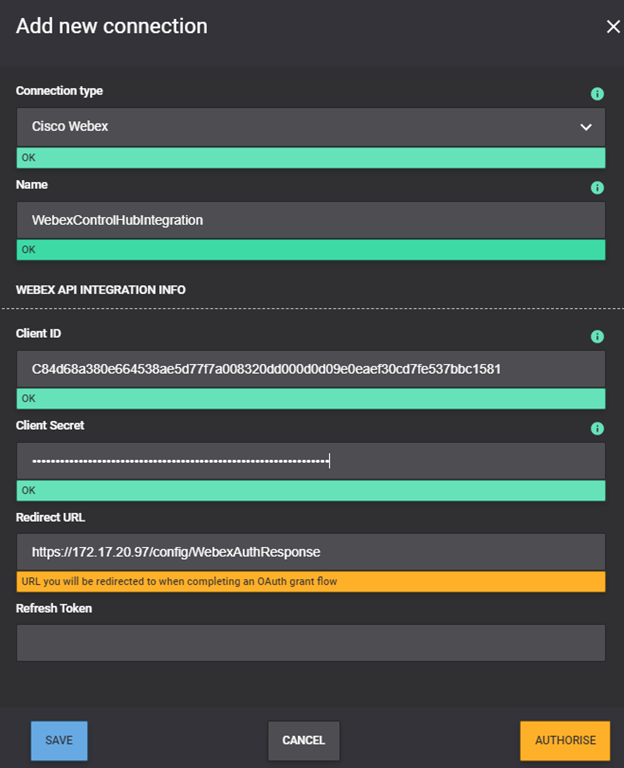
- Click AUTHORISE
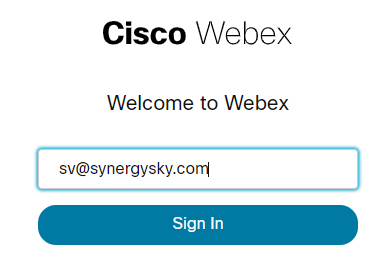
- A new tab should open to begin authorisation. Log in quickly if required
- On the Authorisation page, click "Accept"
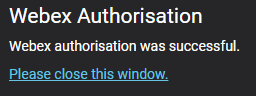
- You should then see the following message
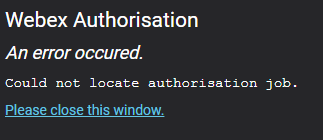
Note: If you see this message instead, you've not moved quickly enough. This happens to everyone. Return to Step 4 in this section and try again.
- Once you have a successful authorisation, the "Refresh Token" field will be populated with an "Authorised" message
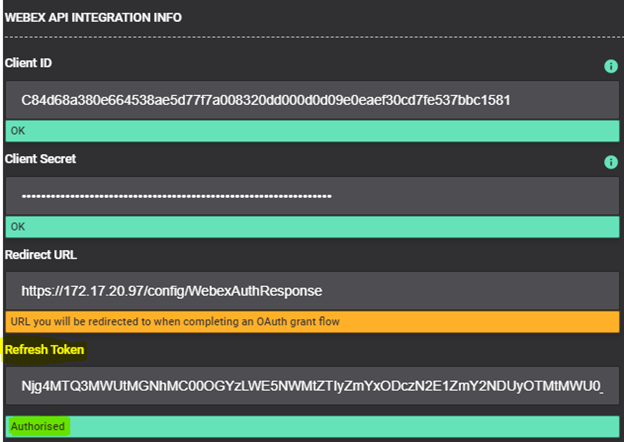
- Click SAVE
- Under "API Integrations" section, click "ADD API INTEGRATION"
- Select "Webex" under the "Used for" drop-down
- Select your previously created connection under the "Connection" drop-down
- Ensure the "Enabled" toggle switches to "ON"
- Select "SAVE"
- In top-right of the Integrations Settings page, select "SAVE CHANGES"
Next steps:
See "Related articles"
- Deploy your configuration
- Add your Webex Control Hub registered Video Systems to the Suite
- Configure rooms
- Test
- Treat yourself to something nice

Jump to...


