Deploy within VMWare
Introduction
The Synergy SKY Platform is a Linux-based VM image that can be hosted within most virtualized environments. This article describes deployment within VMWare environments including how to:
- Download the required virtual machine image
- Import the .vmdk file
- Start the server
You can view our video tutorial at the bottom of this article for a full walkthrough assisted by one of our engineers.
Requirements
| Server Requirements |
CPU: 6 cores
RAM: 16 GB
Primary HDD 25 GB (SSD mandatory)
Secondary HDD: 500 GB (SSD mandatory)
|
| VMware Requirements |
The Minimum Supported version is ESXi v6.5
|
| General Requirements |
Please refer to the General Requirements
|
Step-by-Step Guide
Download the Virtual Machine Image
- Download the virtual machine image from this link.
- Note: Some installations may require a non-uefi image. That image is available here.
SHA256 Checksum for synergyskysuite_rocky_vmware.zip: 8F610B02177F39C3911315EE7EC9EF8C1F047558E0E8288B82D0683DD322B72D
SHA256 Checksum for synergyskysuite_non-uefi.ova: A4F64557597E8CDBA8A17E32AF22F65189607404994F7851D3AAC1518C9ECD47
Importing the Virtual Machine Into VMware
- Extract the zip file to the location/server that you would like the virtual hard drive to reside.
- Browse to Virtual Machines and choose Create / Register VM. In the 'New Virtual Machine' window, select 'Deploy a virtual machine from an OVA or OVA file'
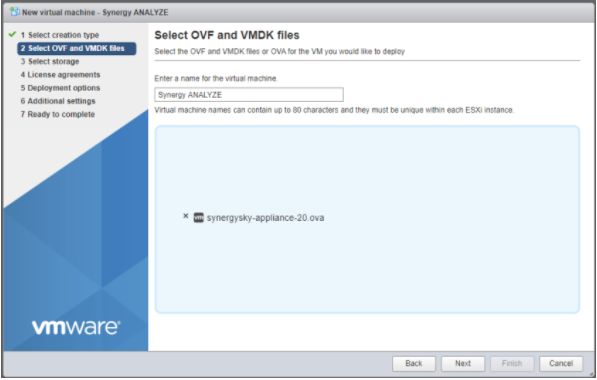
- Type in the name of your Virtual Machine. Browse to the location on your local machine where you downloaded the Synergy SKY Platform and select the file 'synergysky-appliance-20_wmware-disk1.vmdk'

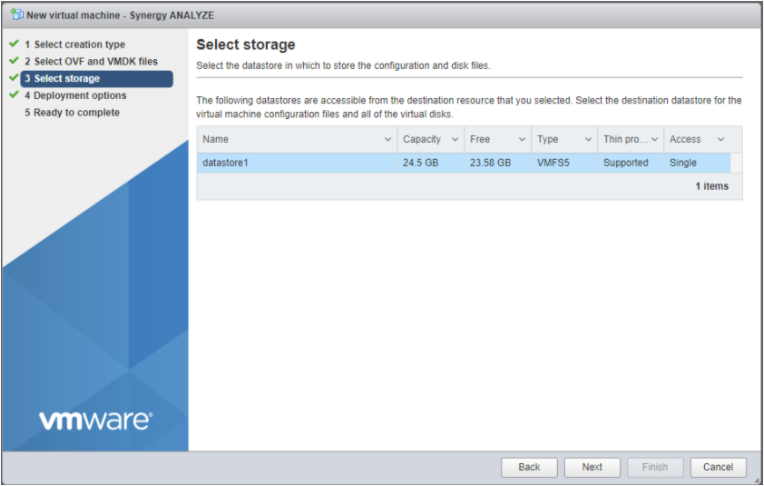
- Select the data store where you would like the Synergy SKY Platform to be installed on
- Select your deployment options.
- Apply your required network mapping
- We recommend 'Thin' Disk provisioning to allow for the database to grow as and when call data is processed and stored in the database.
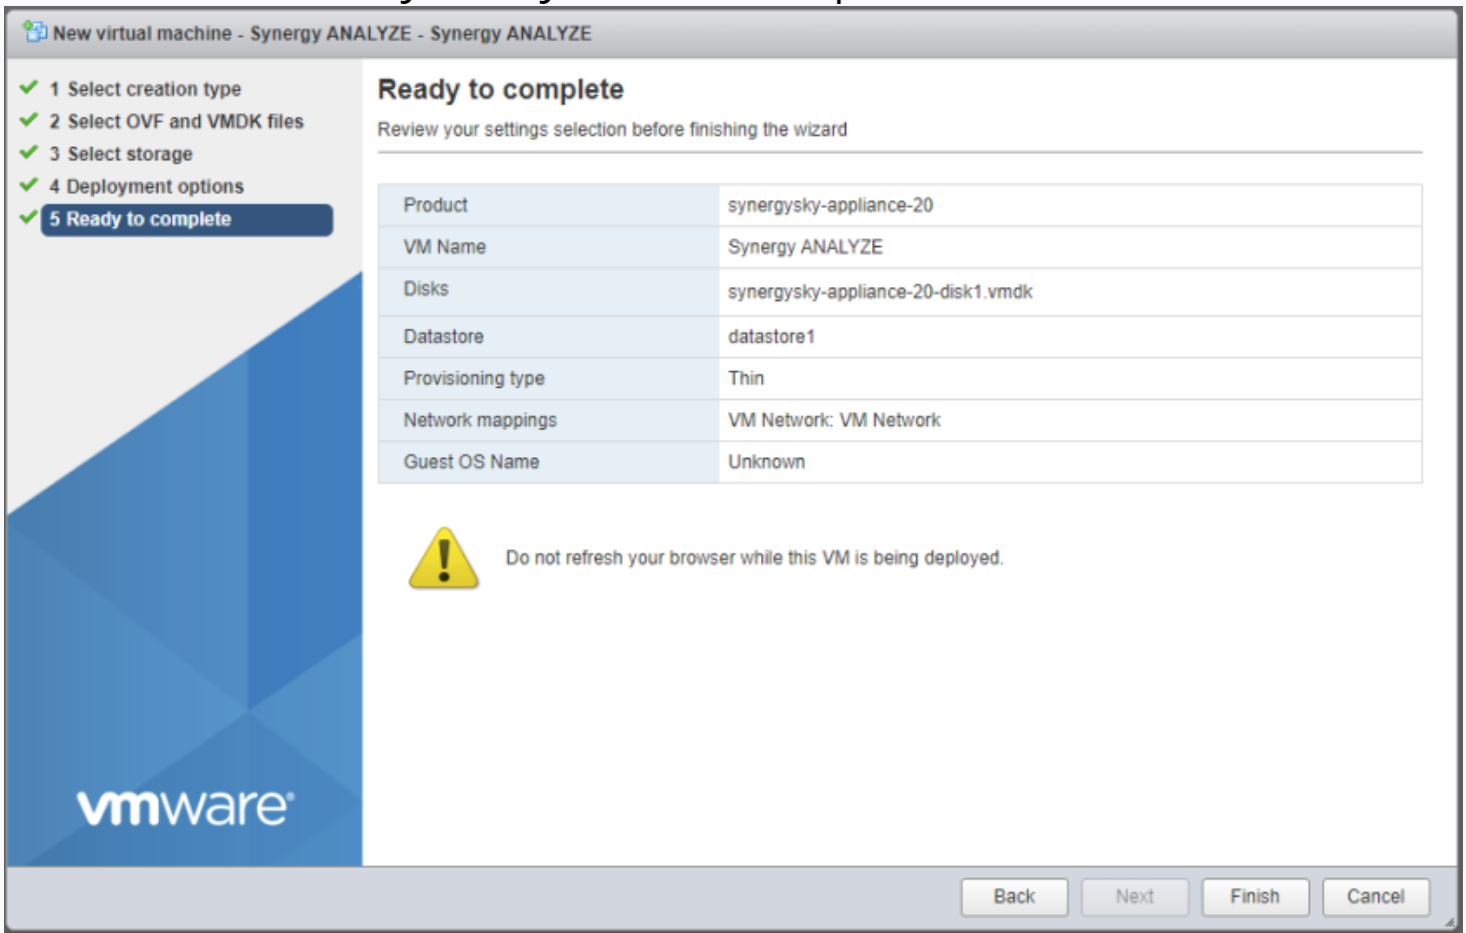
- Click Next, verify that your Server specifications are inline with the requirements and choose Finish
Note: It is recommended that you select "EFI" boot under the boot options for the virtual machine, otherwise the virtual machine might not boot up.
Creating a Secondary Disk
- Once the image has been imported and is available as a virtual machine in your VMWare environment, navigate to the deployed virtual Synergy SKY Platform, right-click on it, and select Edit Settings.
- Click Add to add another hard disk.
- On the Device Type page of the Add Hardware wizard, select Hard Disk, and then click Next.
- On the Select a Disk page, select Create a new virtual disk, and then click Next.
- On the Create a Disk page, set the Disk Size to 500GB
- The Ready to Complete page displays the disk details for verification.
Start the VM:
- Once the VM has been created, browse to the 'Virtual Machines' list and Power On the VM.
Next Step
Your instance should now be running and can be accessed using the default username and password over SSH.
To complete the configuration of the virtual machine, please go to this article.
Video Tutorial


